Dashboard. Framework and search bar
The frame and the search bar will always be present in the application, except when accessing the "control panel" menu, available only to administrators.

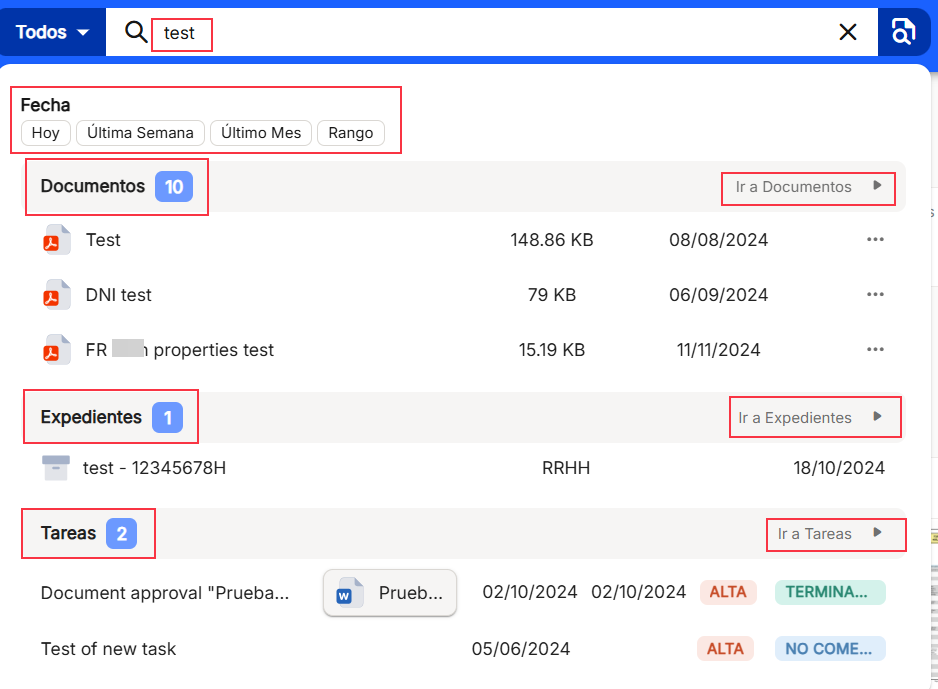
In the center, searches can be performed on the metadata of the documentation archived in the collections, on the tasks configured in the platform, or on both options using the drop-down list for this distinction.
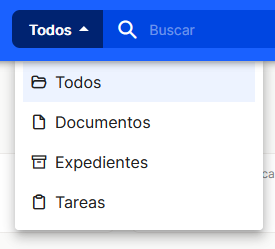
It is only necessary to enter three characters for Waidok to offer results in the so-called"Simple Search", either in"Documents","Files" or"Tasks", allowing direct access to these sections from the icons"Go to ..." to view the list of results obtained in each of the areas indicated and then in each of them you can see the list of results obtained, with the navigation and metadata query options for each of them.
The icon that appears after the search line allows you to display the "Advanced Search" in a new window.
![]()
Once you click on the icon, a new window opens on the same frame to enter the terms and the different document search possibilities offered by the system.
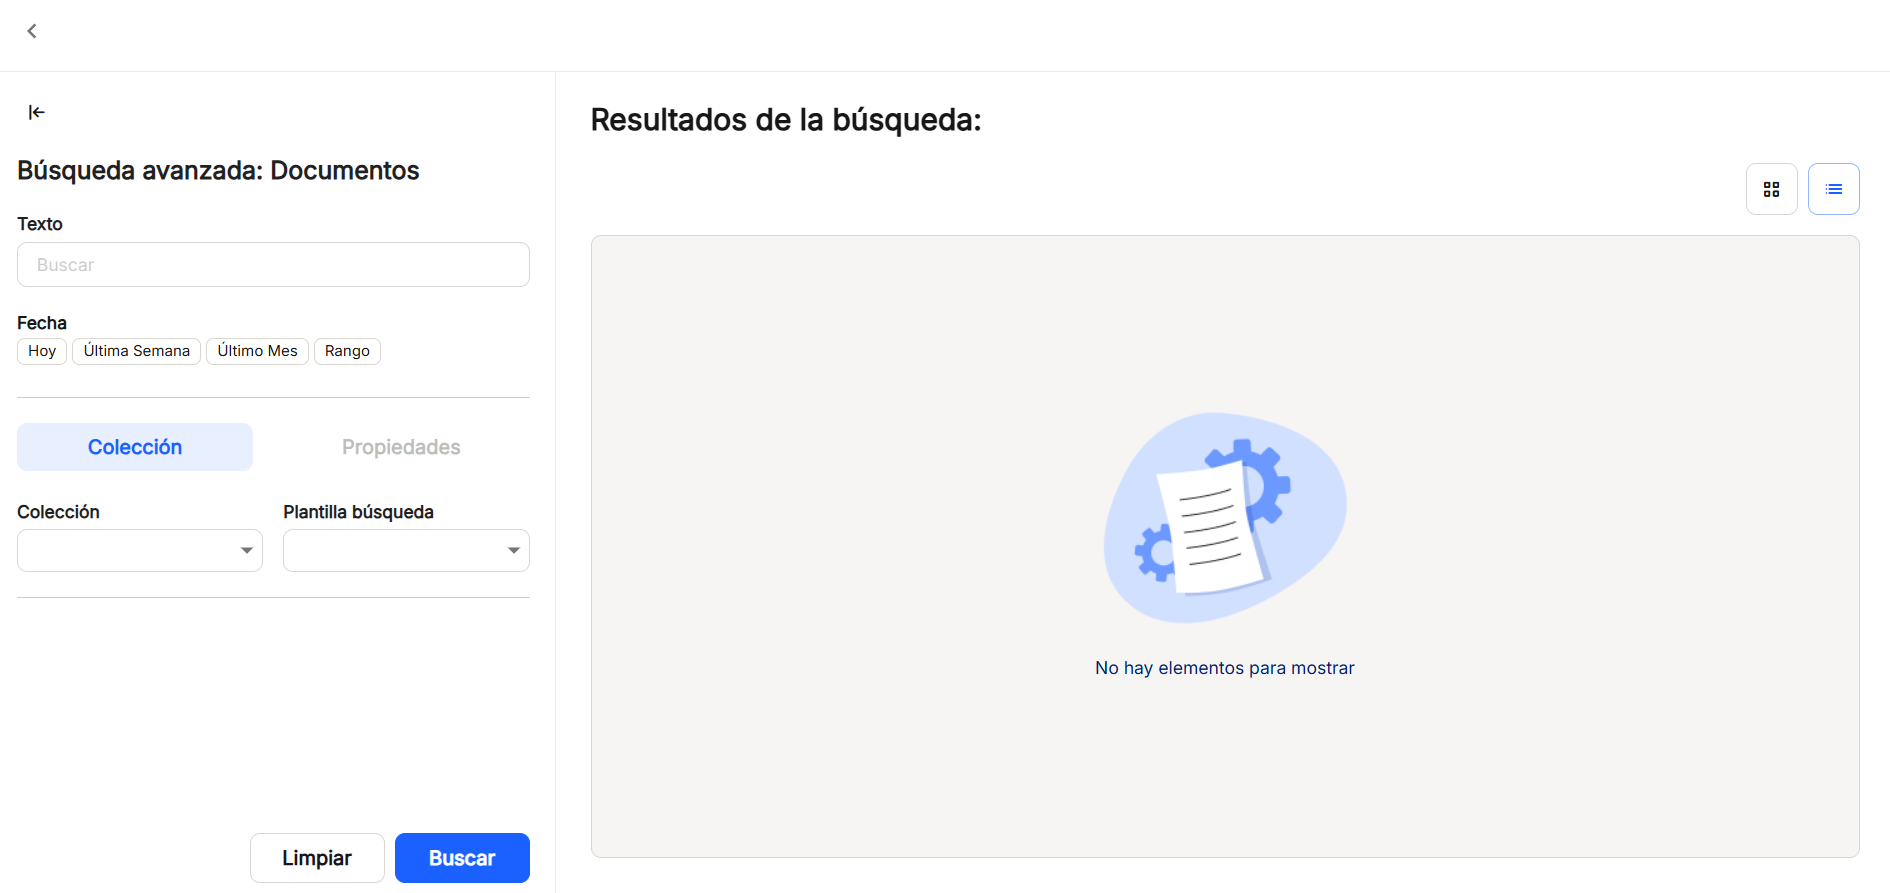
The"Text" grid is enabled for typing in free text characters to be a search term. Only with what is checked here you can get results on documents and records, when the"Search" button is clicked. The terms indicated here can be combined with the rest of the boxes to obtain more accurate searches.
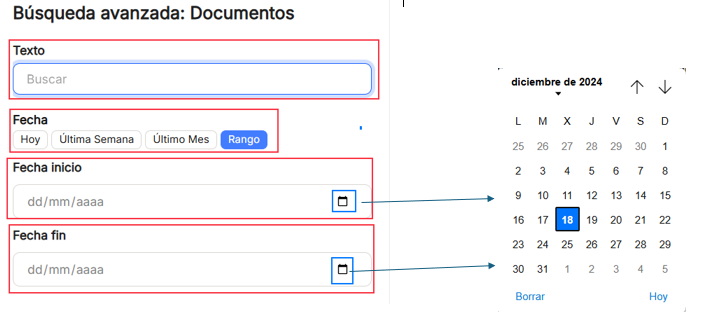
In addition to"Text","Date" always appears fixed in the advanced search screen, allowing you to select"Today","Last Week","Last Month" or a"Range", which will display a calendar to choose the"Start Date" and"End Date".
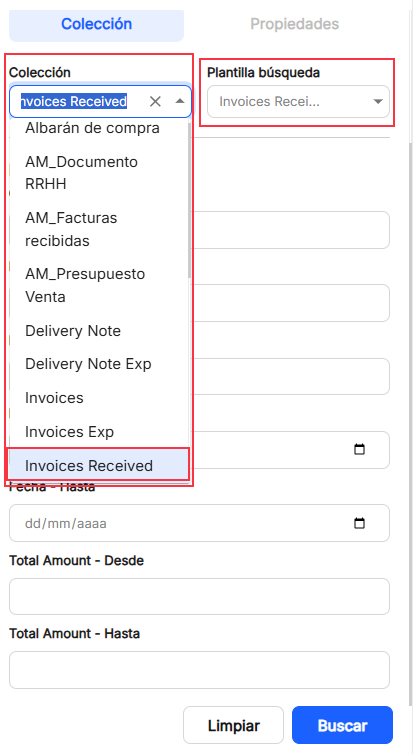
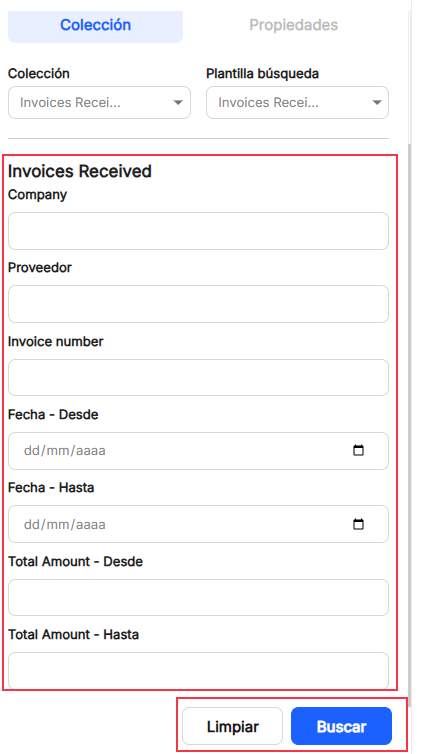
After establishing, if necessary, these search parameters, the search can be further restricted or narrowed down. To do this, you can select one of the existing collections and its search template, which is based on the advanced properties or metadata that each of them have configured. Once you have selected the collection by which you want to filter the document search, you can also complete the data in the properties of that specific collection, so that the results are much more precise. Once the data has been established, we must click on"Search" or if we do not want to keep the search data, we must click on"Clear" to not keep any character in any of the grids.
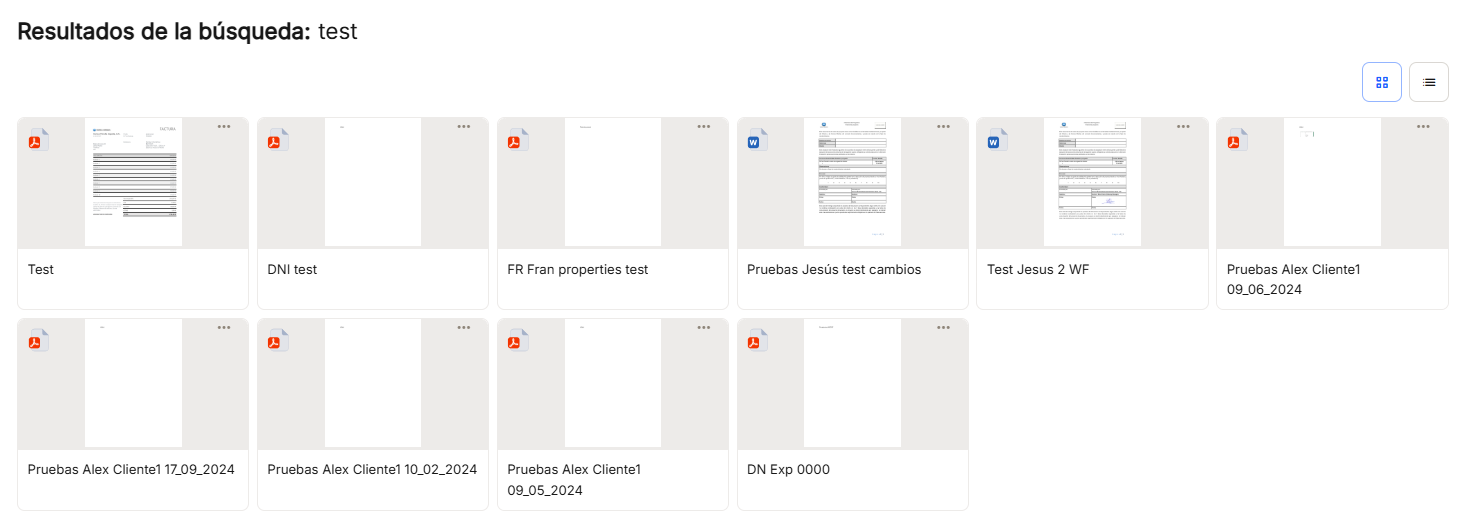
After clicking "Search", the results obtained from the combination of characters and any of the other options of the advanced search are displayed in the right part of the window. Displays the paginated list of documents, with the "List" option (default),
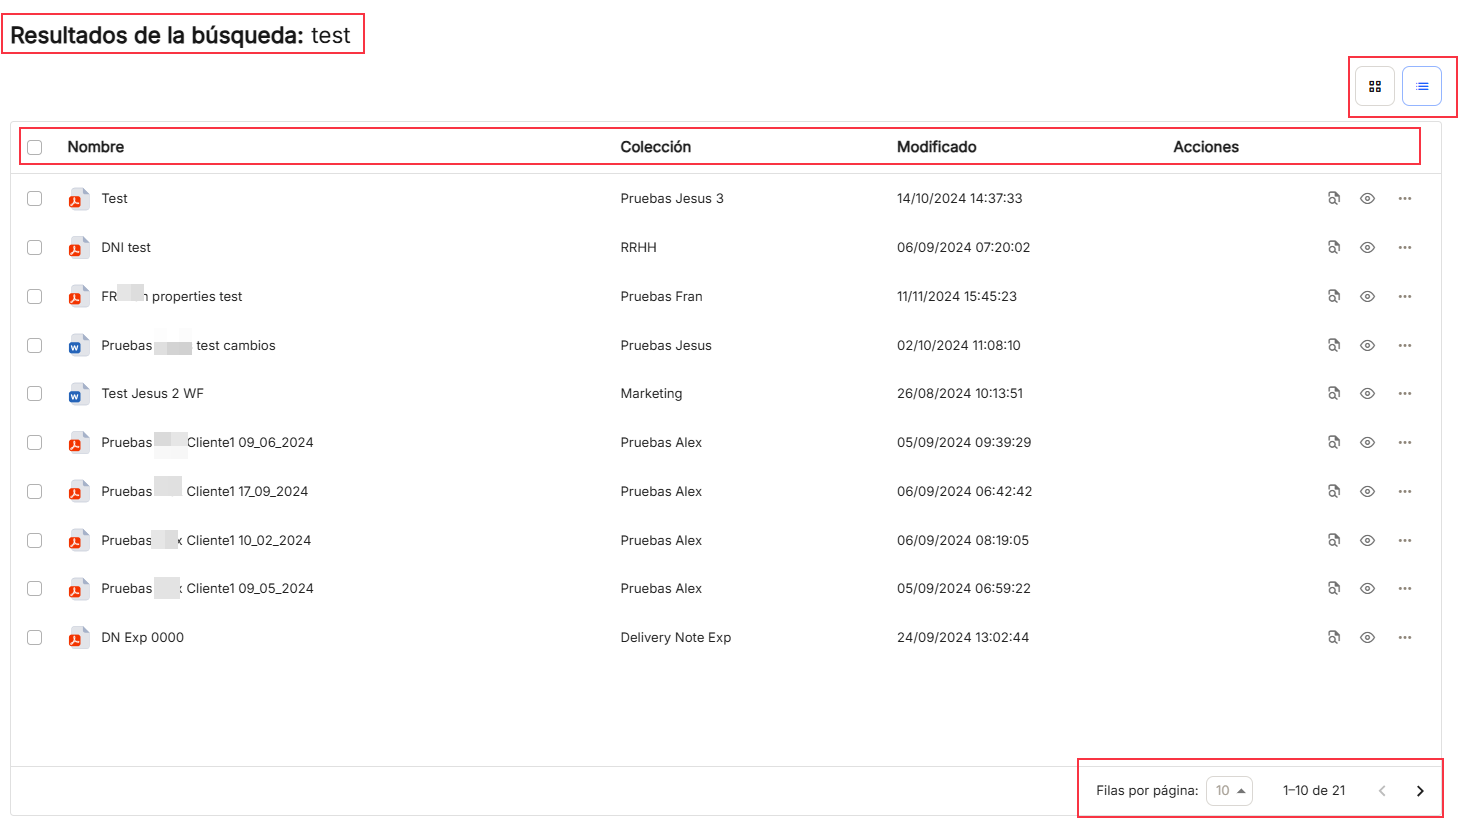
or the possibility of "grid"
From the list view or from the grid view, you can operate on the selected document with the icon of the "..." or by using the "properties" ![]() or by using the "open"
or by using the "open" ![]() to display the document. All these options of the pop-up menus are explained in detail in the menu of "Document Explorer".
to display the document. All these options of the pop-up menus are explained in detail in the menu of "Document Explorer".
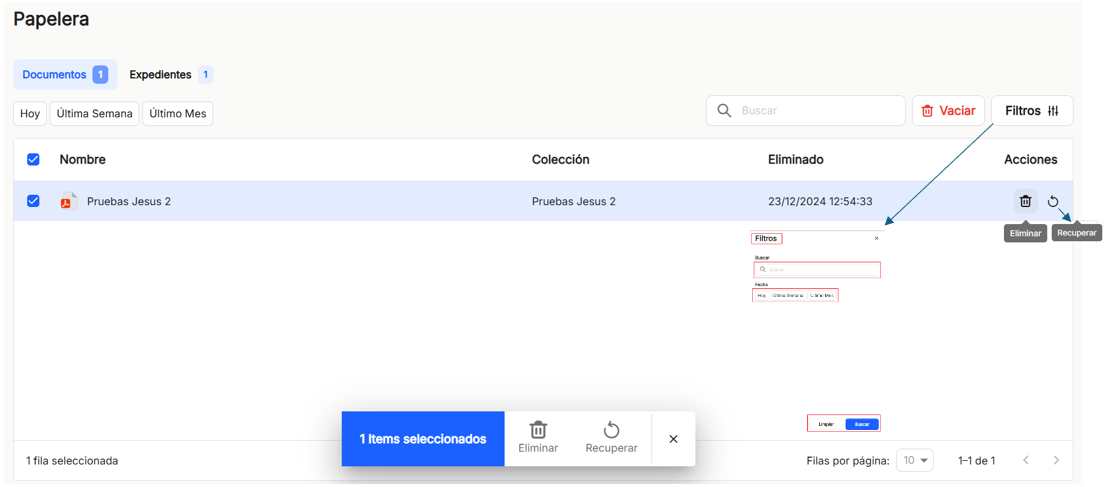
On the right side of the screen there is an icon of a trash can, where you can check the deleted documents and/or files , view their data and, if necessary, recover them. The trash can icon will appear empty or with a number that is the result of the sum of deleted documents and files.
![]()
![]()
The recycle garbage can window will allow the user to perform operations to view documents and files, perform searches using date ranges already established, or searching by text characters, displaying the list of results obtained with the established parameters, and also filtering, with the options shown. Once you have selected any of the documents or files, you can delete it definitively or restore it to its original folder or file by clicking on the icons on the right or on the icons in the"Selected items" subwindow.
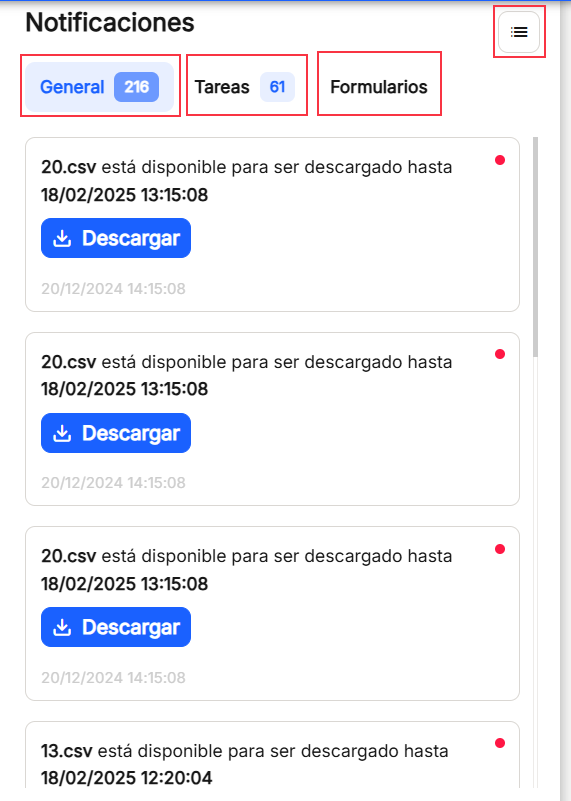
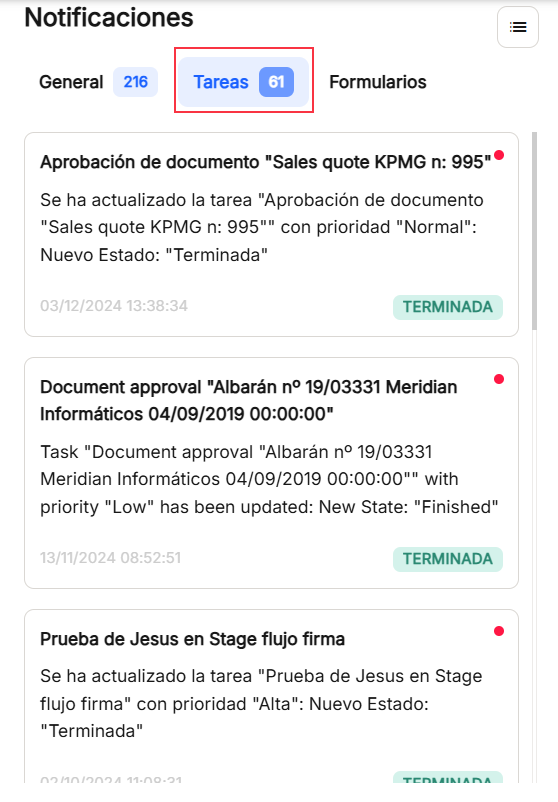
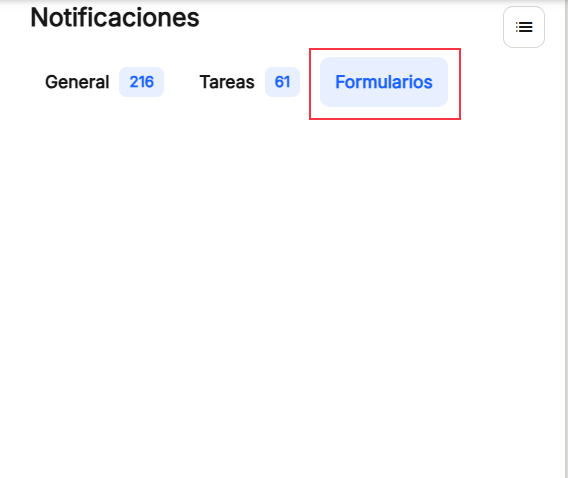
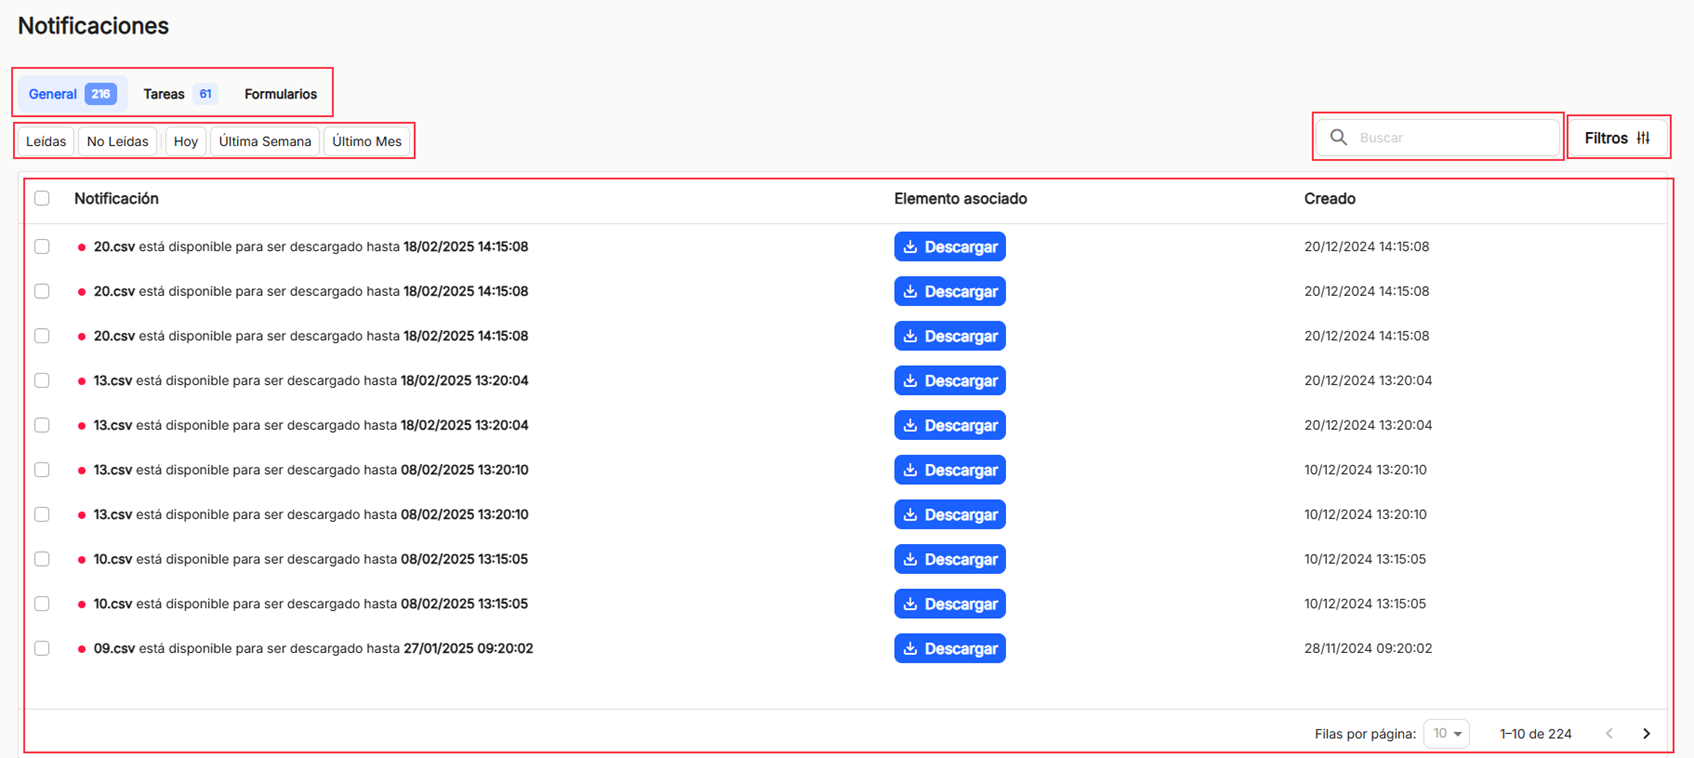
Next, a bell icon, with or without overprinted numbers, indicates that there are notifications for the user to review, referring to sections such as"General", " Tasks" and"Forms", and can also be accessed by clicking on the notification.
In"General" it will be possible to consult the notifications that the system produces for notifications of available export files, as shown in the image. In"Tasks", the user will be able to consult and access messages related to document approval, signatures, workflow, etc. And finally,"Forms", notifications will appear referring to the completion of forms to be created in Waidok.
![]()
Once the notifications column is displayed, there is also the possibility of clicking on the icon that appears at the top right, called"List", to display the notifications in list mode, of any of the aforementioned options.
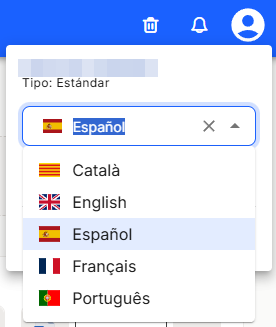
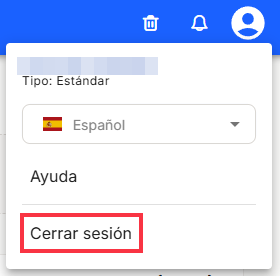
In the same blue bar, at the end of it, you can see the icon ![]() which will refer to the user and his data, which is logged into Waidok.
which will refer to the user and his data, which is logged into Waidok.
You can see the name assigned to the user who has logged in to the platform, the type of user with which he/she has been registered with the corresponding permissions, as well as a drop-down menu where you can choose the language in which all the menus and options of the application will be displayed.
It is also possible to log out the user to return to the login page using this option.
No comments to display
No comments to display