Menu. Document Explorer
 DOCUMENT BROWSER
Display in a new frame the names of the collections created and their hierarchical order, as well as the ability to browse the folders that have been created with the name of each collection. This allows you to view the documents in each of the folders.
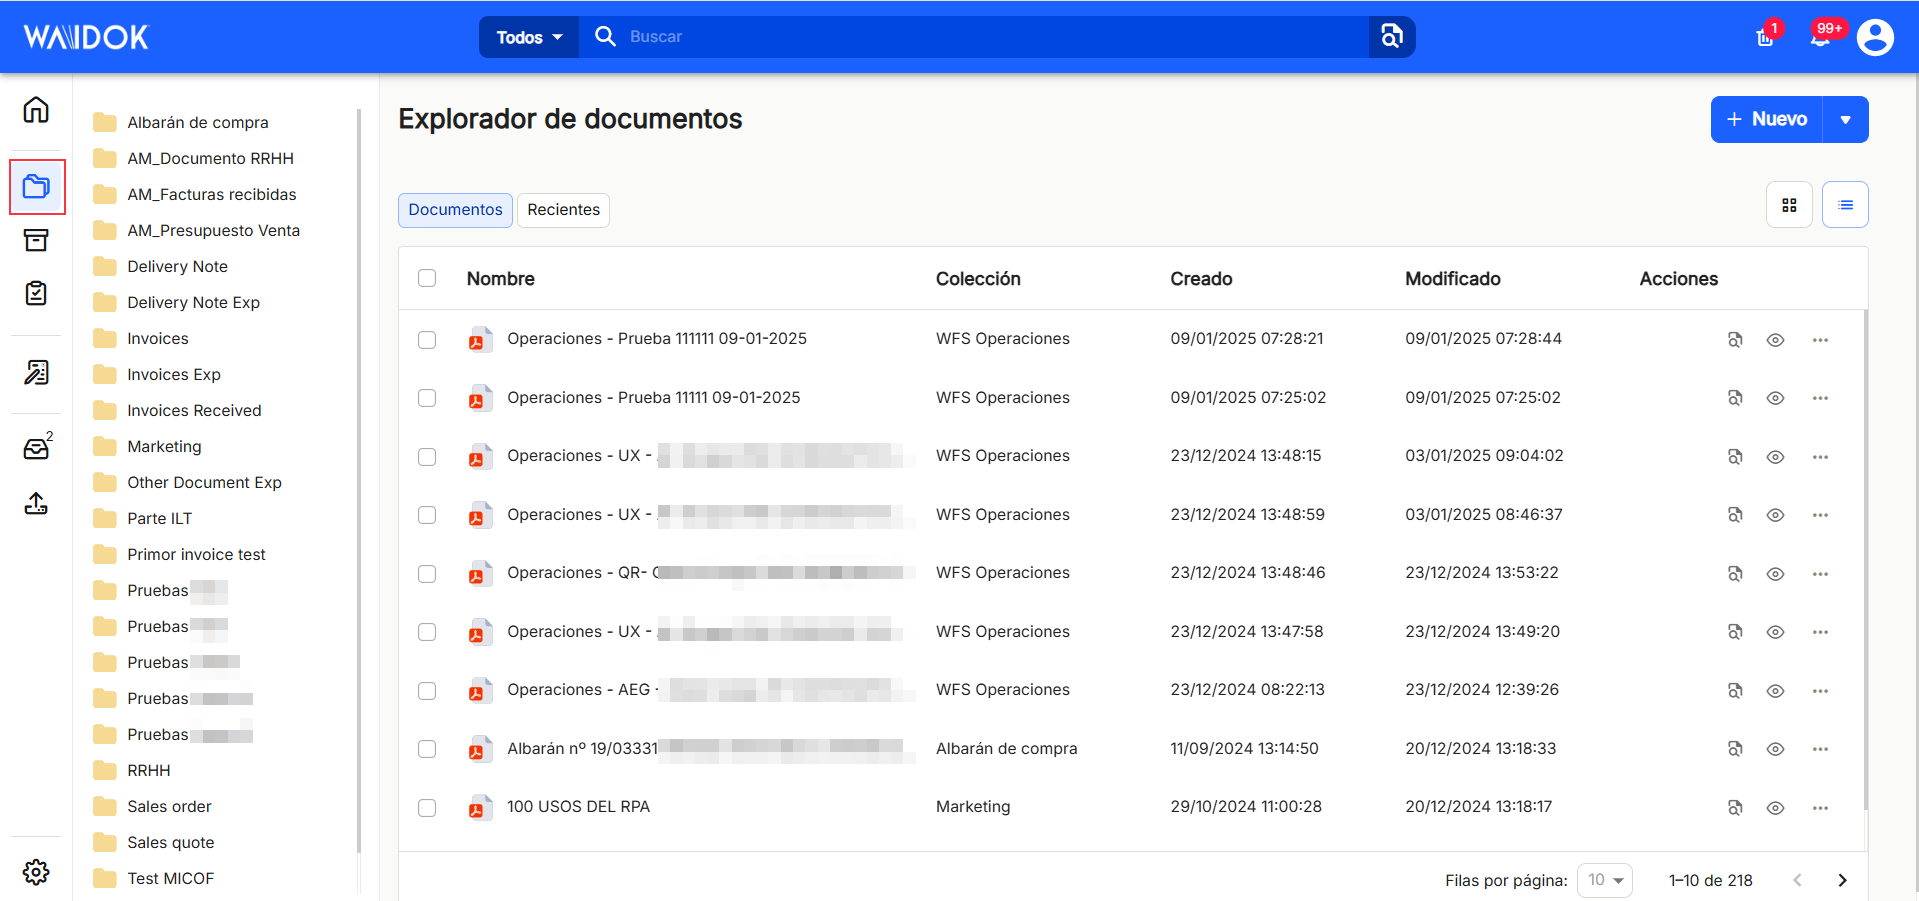
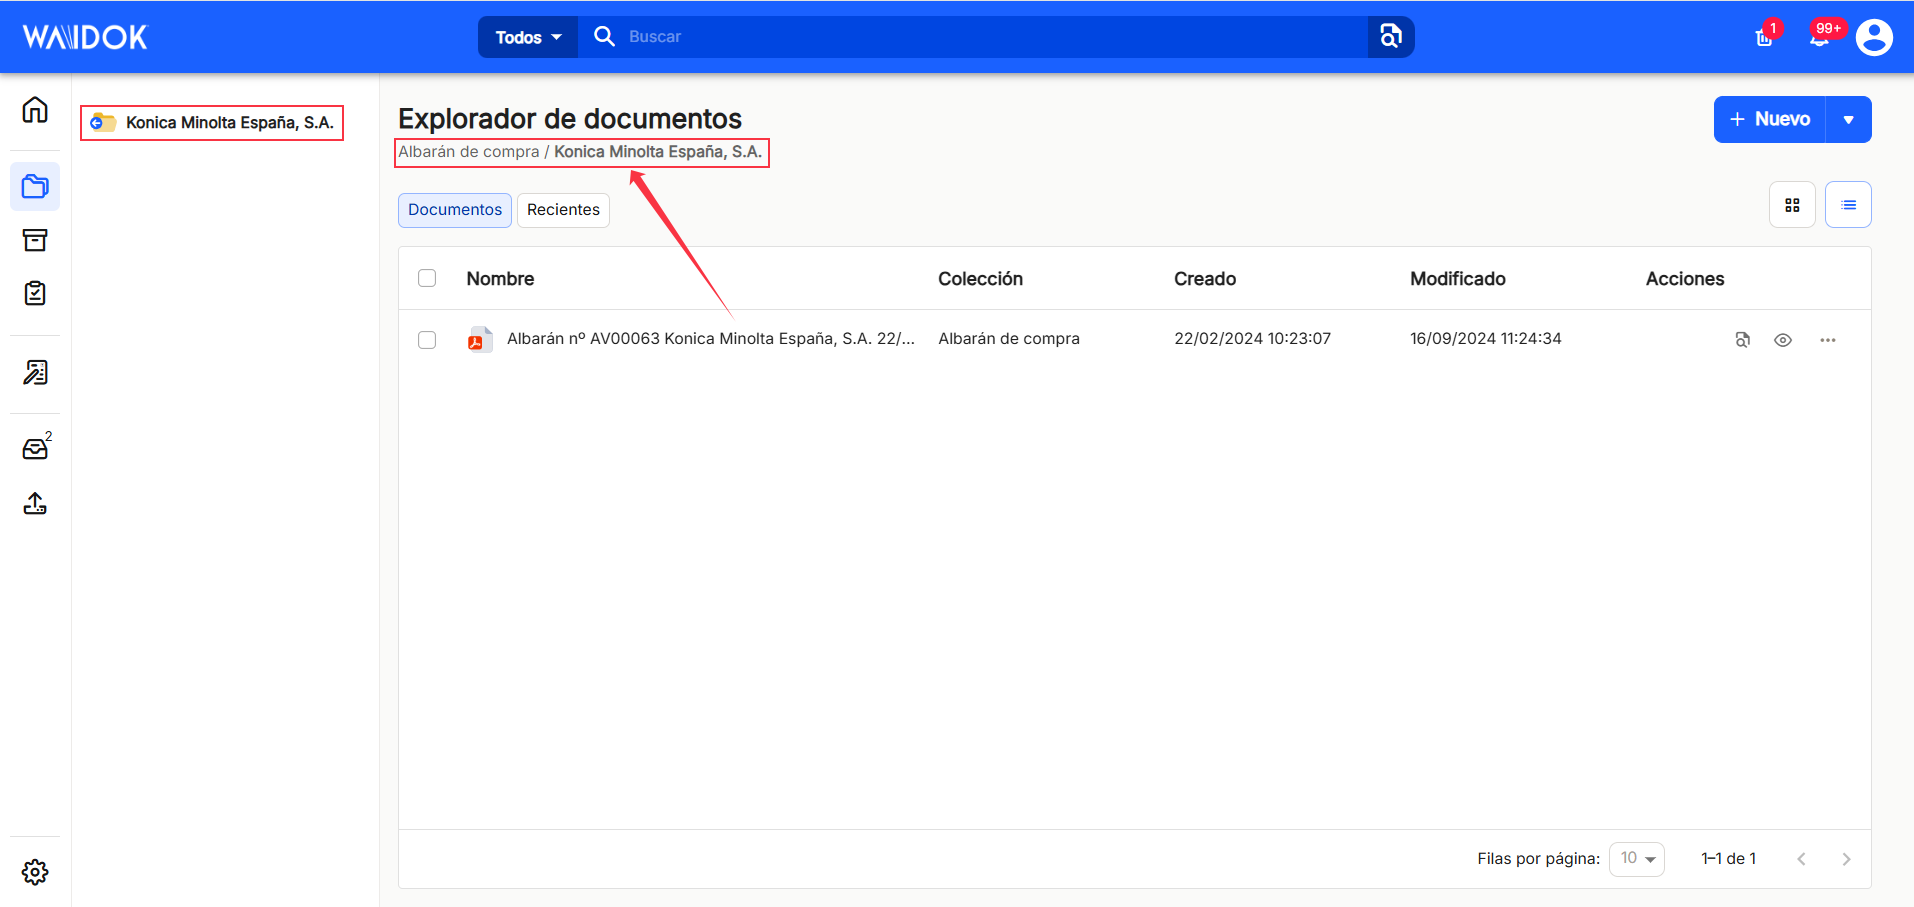
Under "Document Explorer" the hierarchy of each collection is outlined, separated by bars, allowing you to navigate by clicking on the name of each folder.
In the right part of the window, the button "New"When clicked, it will offer the user the possibility, in a new pop-up window, to add documents to the inboxes, ![]() or with the option of "manual upload", where the user selects where the documents are uploaded from, and the properties determined are applied to them, or with the option of "automatic upload"The system scans the documents and automatically applies their defined properties. The documents must be dragged to any of the existing inboxes in the application.
or with the option of "manual upload", where the user selects where the documents are uploaded from, and the properties determined are applied to them, or with the option of "automatic upload"The system scans the documents and automatically applies their defined properties. The documents must be dragged to any of the existing inboxes in the application.


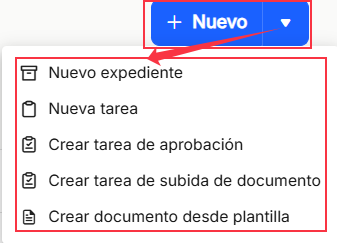
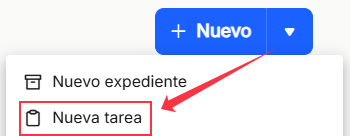
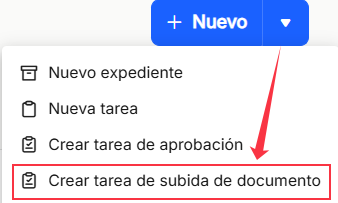
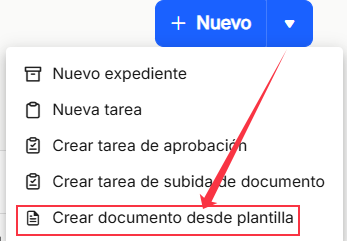
In the "New" button, on the right side, the arrow that appears, when pressed, will display a new drop-down menu that will offer the options "New file" (allows you to generate a new file), "New task" (allows you to create a new task), "Create approval task" (allows you to generate a new approval task), "Create document upload task" (allows you to create a new task to upload a document to created collections) and "Create document from template" (allows you to create new documents by filling in data in already created templates).
"New file"
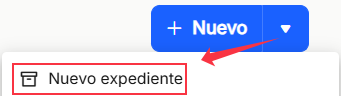
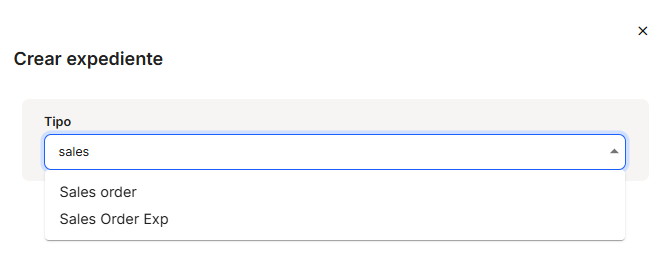
The"New file" option will allow you to directly generate a new file by filling in the "Type" box, where you must select the type of file, depending on what has been previously configured from the "Control Panel" in "Types of files". A name must also be assigned to the new file by filling in the "Name" field.
"New task"
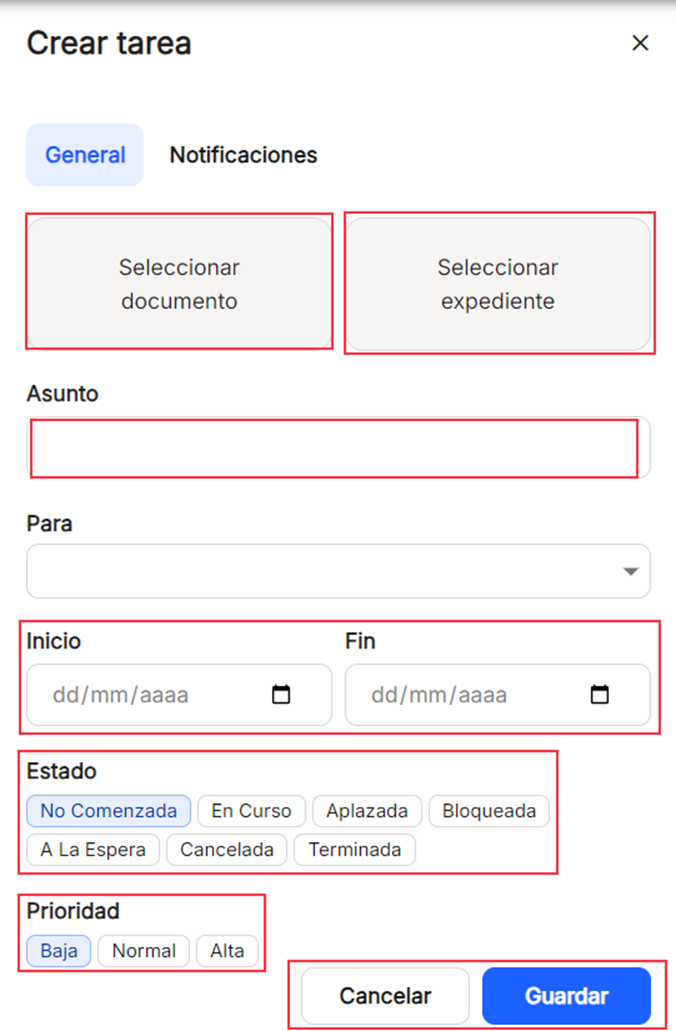
"New task" will allow you to create a new "General" task directly, either applied to a document by clicking "Select document" or to a file by clicking "Select file". The "Subject" of the task must also be indicated in a free text box. Likewise, a user or group can be selected from the drop-down menu in the "To" box. A "Start date" and an "End date" can also be selected for the task, and a "Status" and a"Priority" type can also be selected, with the different options offered.
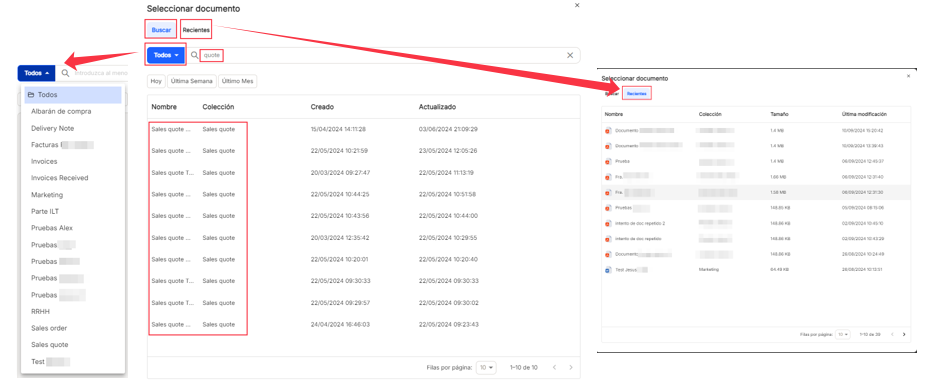
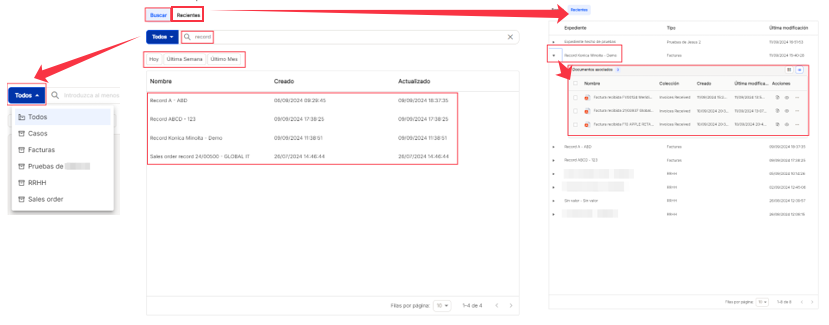
"Select document". It allows the user to select a document to be associated with the created task, either by searching through all existing collections, or by selecting as a filter, any of those shown in the "All" drop-down list that will be displayed when the arrow is pressed, together with the possibility of filtering by the time periods already established, such as "Today", "Last week" or "Last month". Just by entering three initial characters, the system will be able to search and locate documents containing them. The "Recent" tab will display a list of the latest documents that have been modified or entered in the tool so that you can select them without having to search.
"Select file". It allows the user to select a record to be associated with the created task, either by searching through all types of registered records or by selecting as a filter one of those shown in the "All" drop-down list that will be displayed when the arrow is clicked, together with the possibility of filtering by the time periods already set, such as "Today", "Last week" or "Last month". Just by entering three initial characters, the system will be able to search and locate files containing them. The "Recent" tab will display a list of the latest files that have been modified or entered into the tool so that you can select them without having to search. The documents associated with the file can be displayed by clicking on the arrow to the left of the file name.
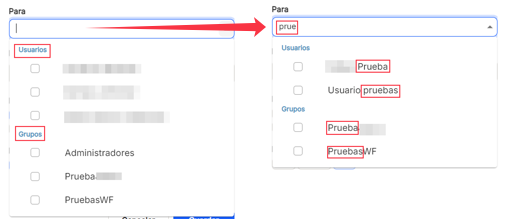
"To". You can select from the search a user or group from the existing ones, use the search, and just enter three characters, and it will locate the relevant matches. By default, it will always display the first three values of the list of both users and groups, but searches will be performed on all the lists already established.
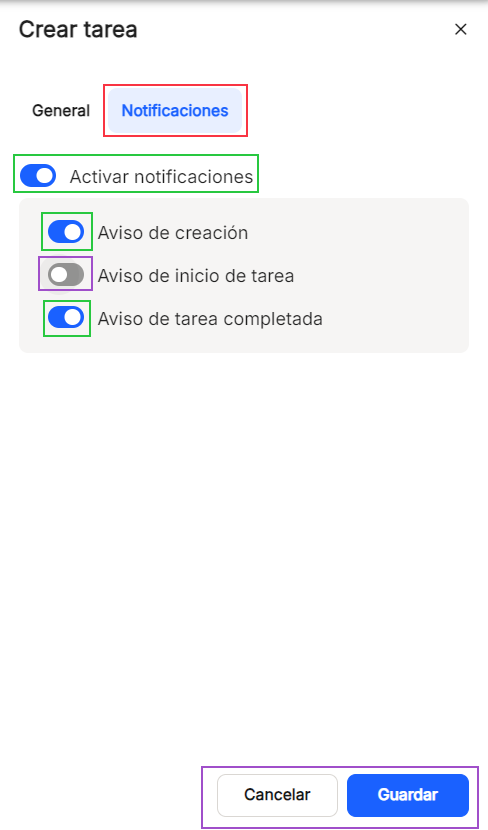
By clicking on "New task", it will also be possible to enable or disable notifications for that task. The options are "Creation notification" (notifies the task recipient that a task has been assigned), "Task start notification" (alerts the task recipient of the day the task will start) and "Task completed notification" (issues an alert to the task creator once the task has been completed).
"Create approval task"
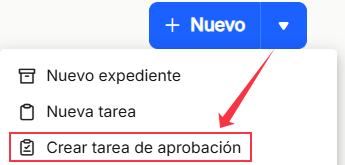
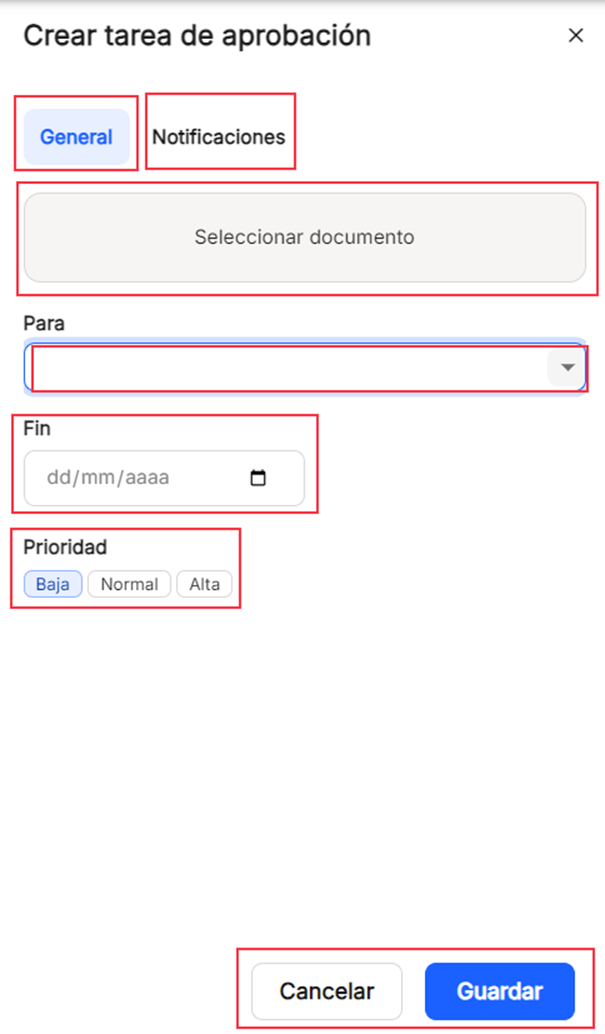
"Create approval task" will allow you to directly create a new approval task, applied to a document by clicking "Select document". You can also select a user or group from the drop-down menu in the "To" box. You can also choose an "End date" for the task, and you can also select a"Priority" type, with the different options offered.
"To". You can select from the search a user or group from the existing ones, use the search, and just enter three characters, and it will locate the relevant matches. By default, it will always display the first three values of the list of both users and groups, but searches will be performed on all the lists already established.
By clicking on "New task", it will also be possible to enable or disable notifications for that task. The options are "Creation notification" (notifies the task recipient that a task has been assigned), "Task start notification" (alerts the task recipient of the day the task will start) and "Task completed notification" (issues an alert to the task creator once the task has been completed).
"Create document upload task"
The "Create document upload task" will allow you to directly create a new document upload task by filling in the "Subject" box with free text. You can also use the drop-down list in the "To" box to select a user or group from the existing ones. It is obligatory to select a "Collection" from the drop-down list that is displayed, being able to scroll to see all of them. You can also select an "End date" for the task, and you can also select a"Priority" type, with the different options offered.
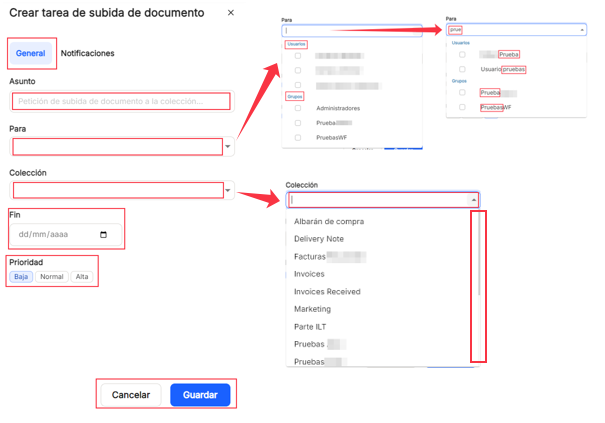
"To". You can select from the search engine a user or group from the existing ones, use the search, and just enter three characters, and it will locate the relevant matches. By default, it will always display the first three values of the list of both users and groups, but searches will be performed on all the lists already established.
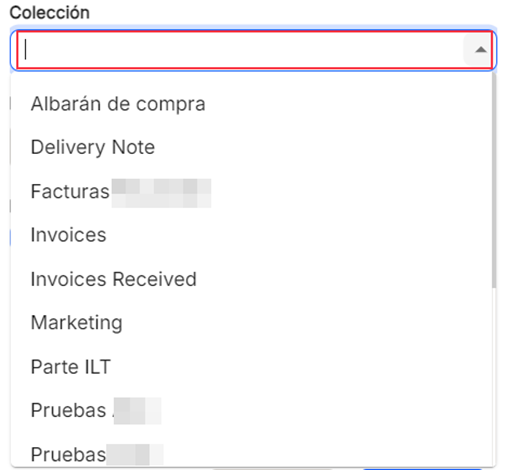
"Collection". You can select from the drop-down list one of the collections already created in the system.
By clicking on "New task", it will also be possible to enable or disable notifications for that task. The options are "Creation notification" (notifies the task recipient that a task has been assigned), "Task start notification" (alerts the task recipient of the day the task will start) and "Task completed notification" (issues an alert to the task creator once the task has been completed).
In the main window, you can view the total documents in each of the folders by clicking on the "Documents" button (marked by default) or by clicking on the "Recent" button to view the documents in that folder, sorted by the most recent date.
![]()
With the "grid" or "list" icons (marked by default), it allows the display of the documentation in the "documents" or "recent" sections, in the selected mode.
![]()
The table where the documents of all the collections or of each one of them are reflected, allows different possibilities of sorting and classification, allowing to show or hide the different columns.
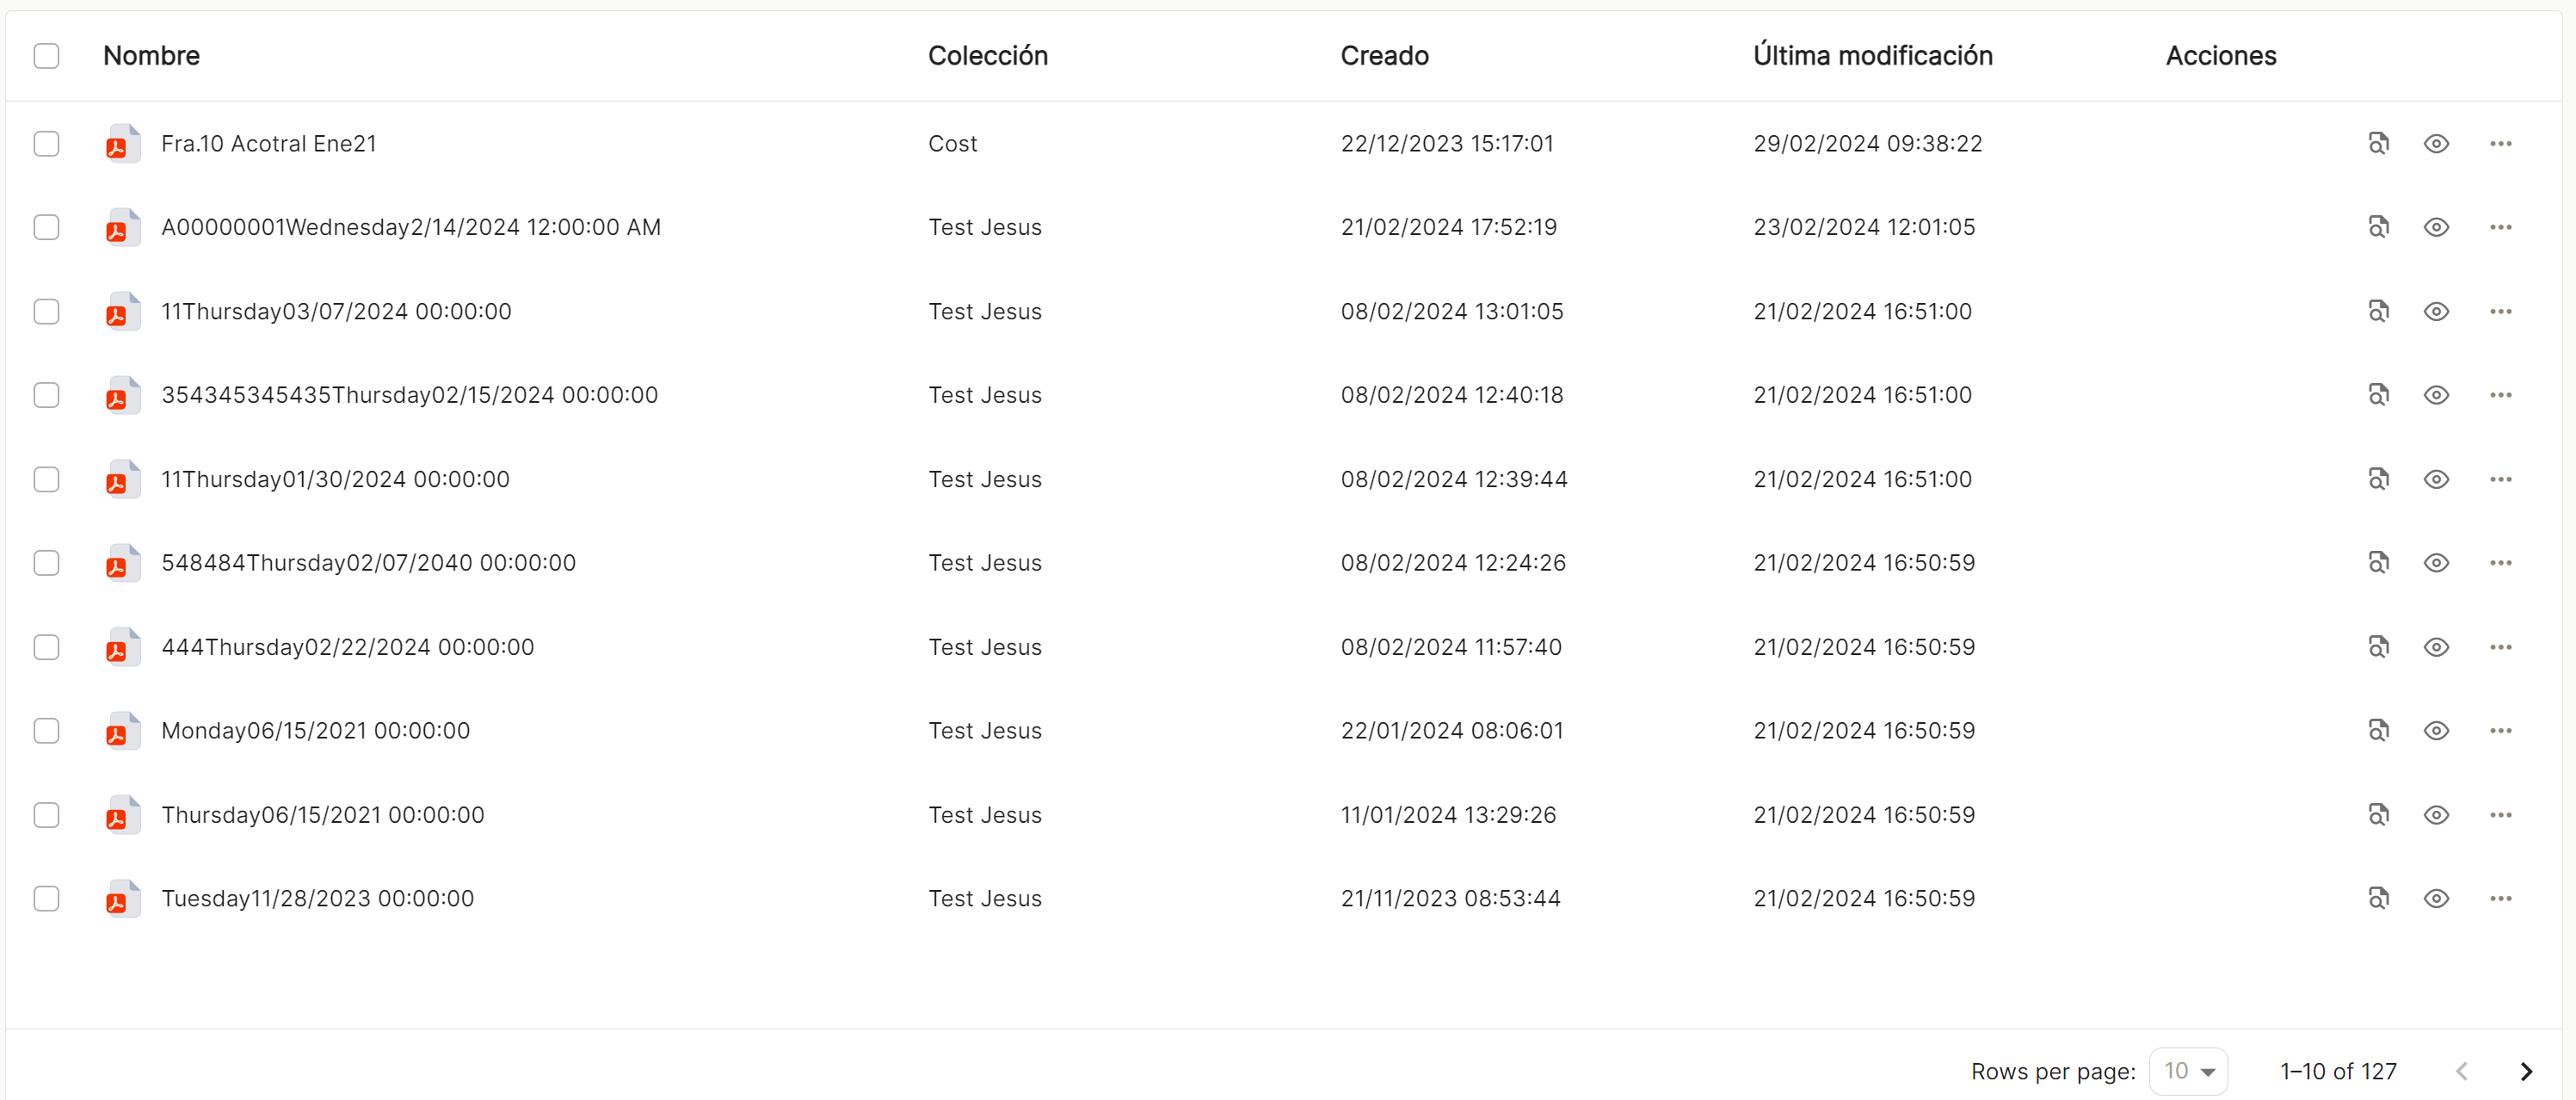
If you click on the name of the document, without having selected or checked the box of all or one of them, you will display the preview of the document, whose default format looks like the one shown below.
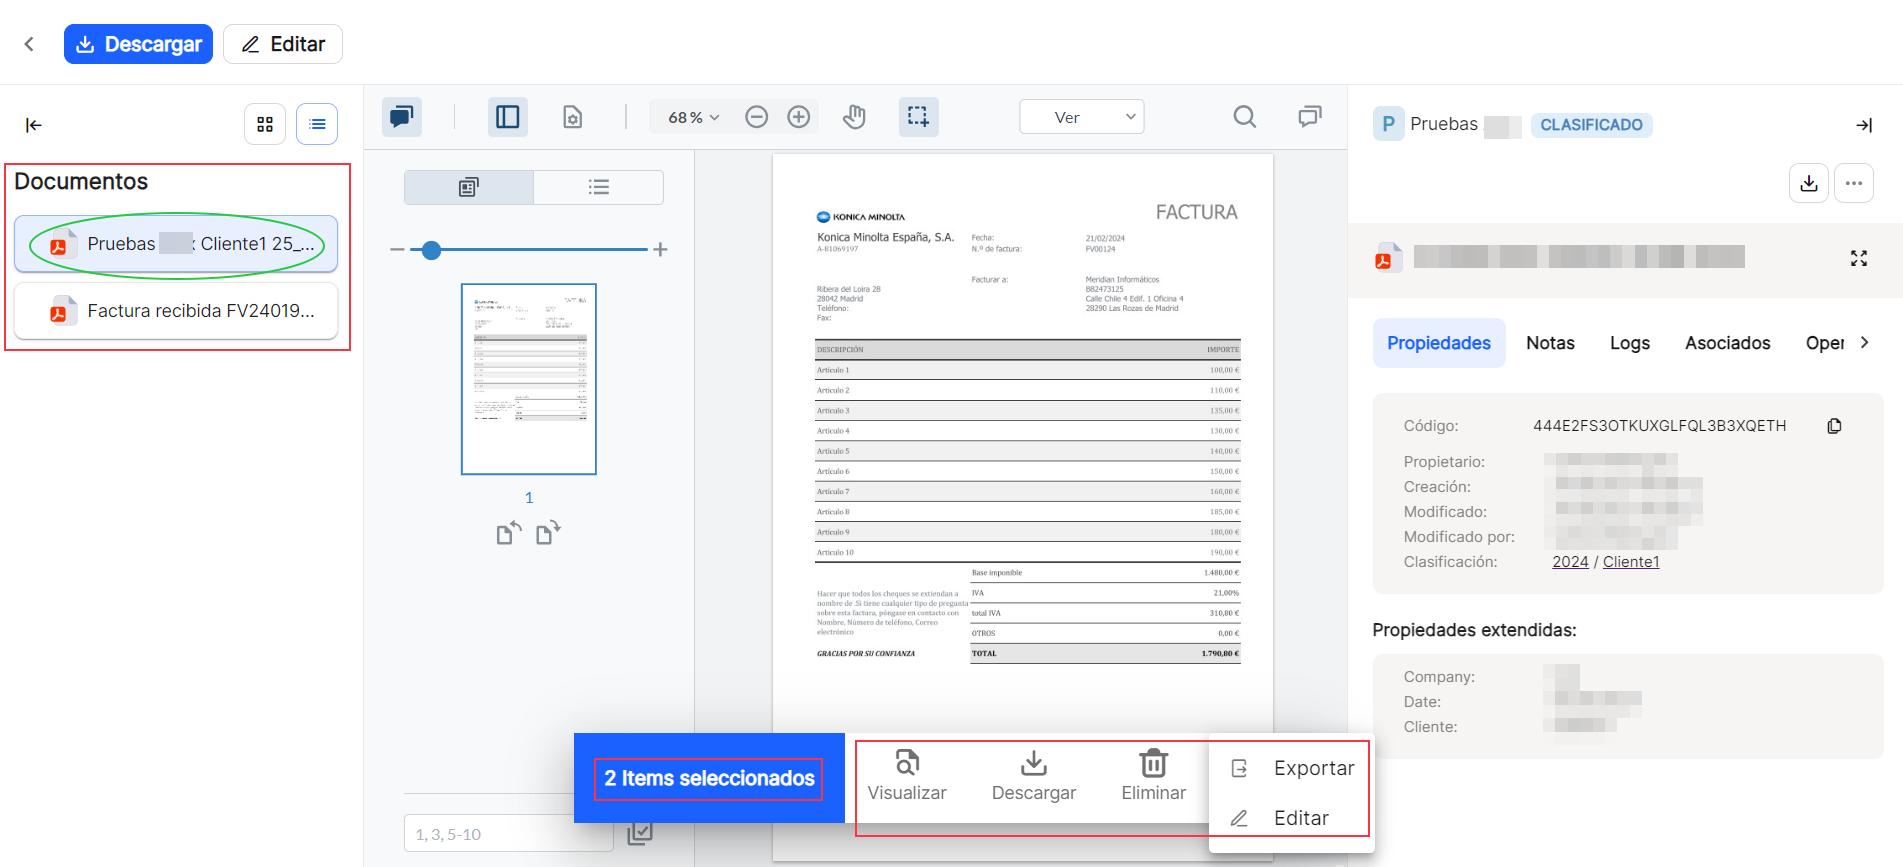
From the main menu window, in the table with the list of documents, if you check or activate the checkbox on one or all the documents, you will be able to perform a series of operations on the selected items, such as "view", "download", "send to trash", and the three vertical dots display the options of "export" (only a selected document) or "associate to file".
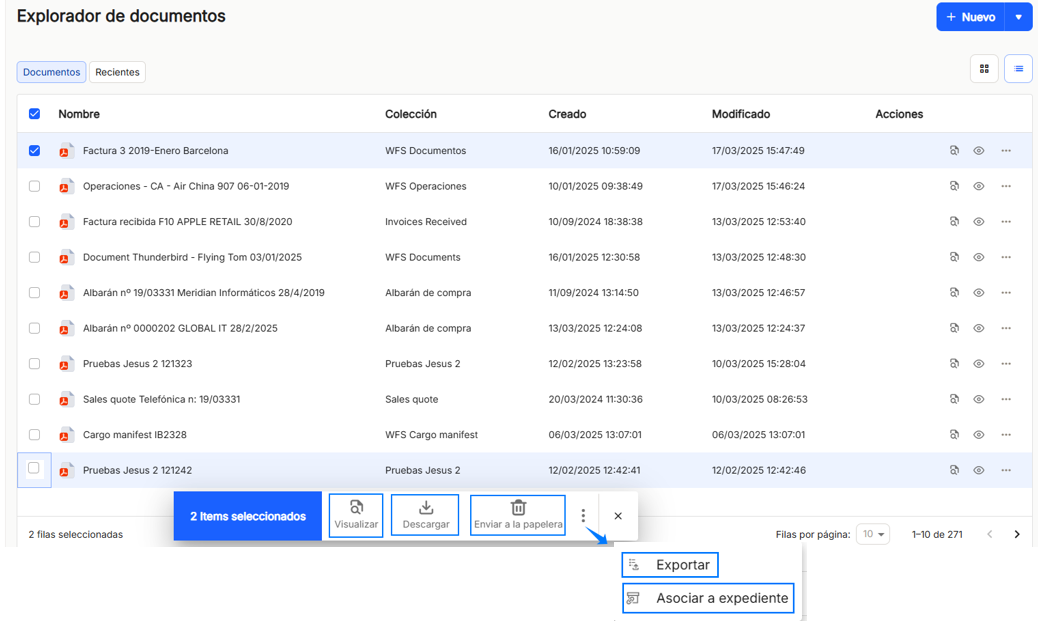
If any of these options is used, it will be applied to the marked document(s), with the pop-up window always visible.
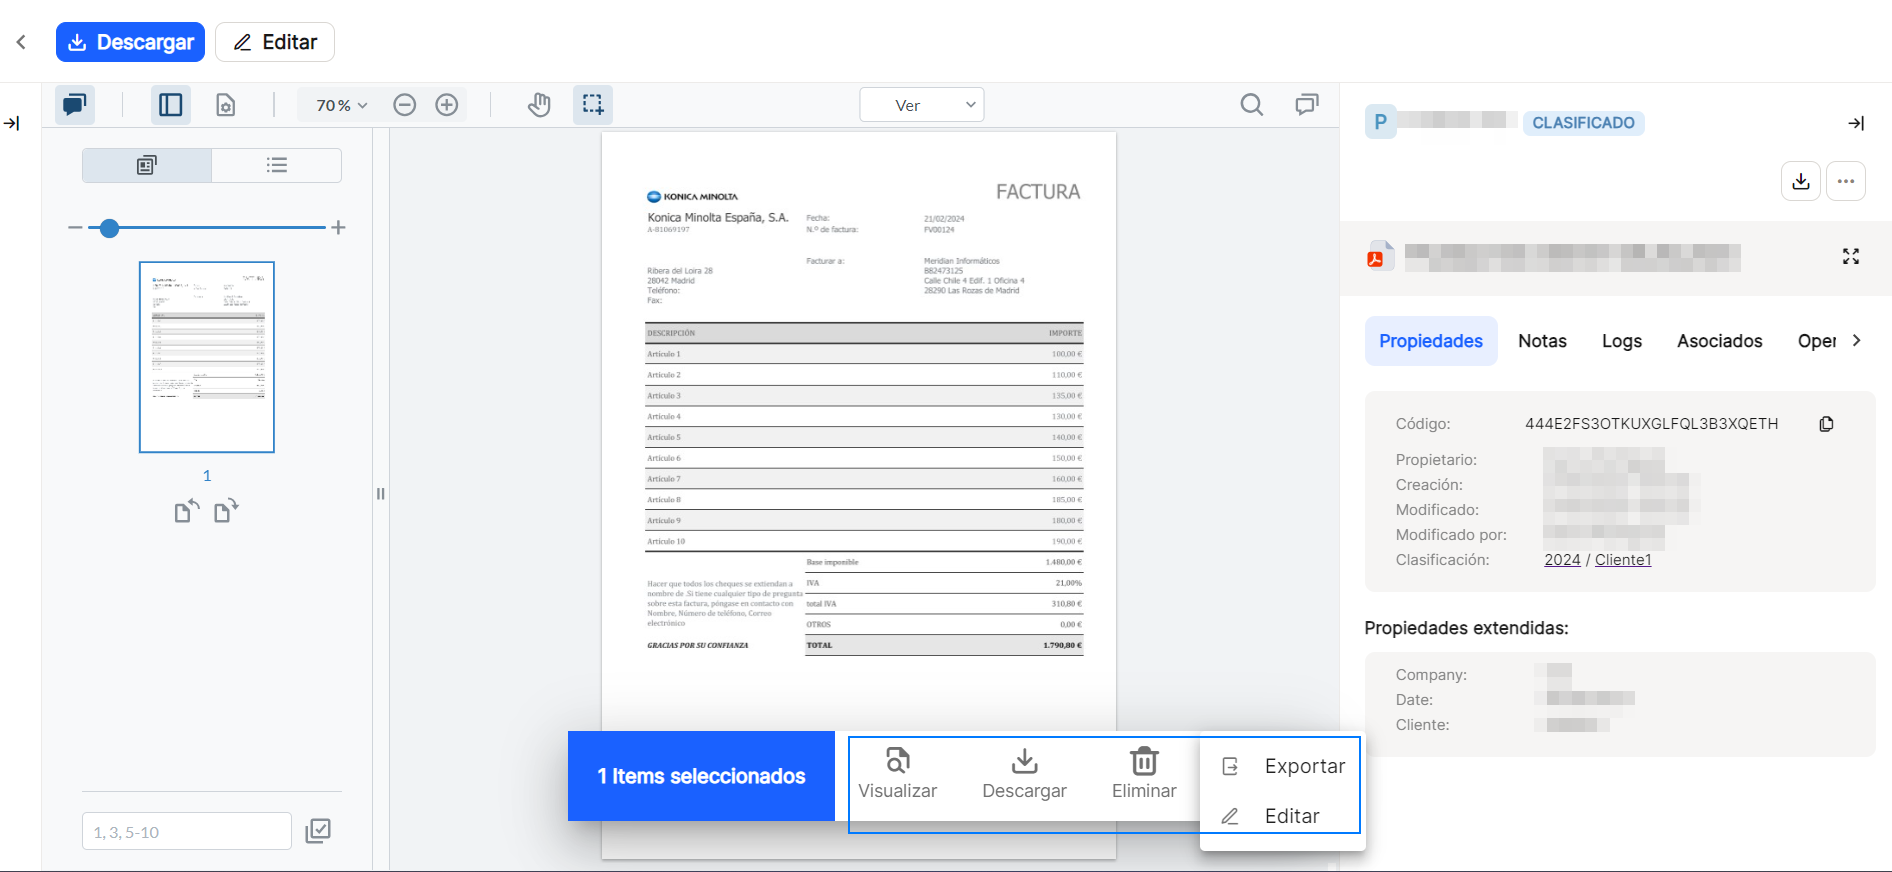
In the event that several documents are marked, all the selected documents can be seen in the left panel of the window, and the document on which the operation to be carried out in the pop-up window will be marked in blue, for the user's information, and the default window will appear like this.
Each document will appear by default in each line, with its name, as its conformation has been defined in the option "name", where the name of the document appears, "collection", in which it is stored, "created", where it shows the date of creation or entry and saved in the application, "last modification", with the date of the last modification of the document and "actions", with quick access icons. ![]() .
.

In the column "shares"The following shortcuts are available for the documents already uploaded "properties" , where you will be able to view and perform different operations with the properties of each document, "open"
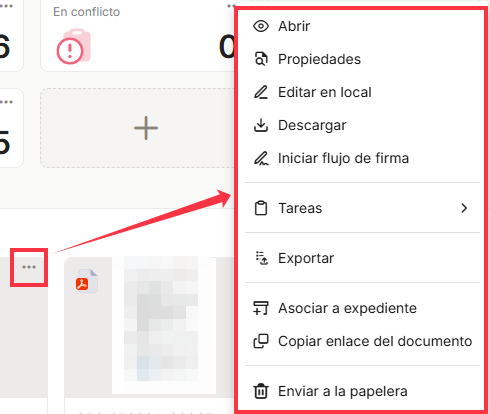
 ![]() , from which it will allow the document to be viewed. Through the icon "..."a more extensive menu will be displayed, with added functions, such as "open", "properties" "edit", "download", "Tasks", and with subtasks > "Create task" and "Create approval task", "export", "associate to file", "Copy document link" and "Send to trash".
, from which it will allow the document to be viewed. Through the icon "..."a more extensive menu will be displayed, with added functions, such as "open", "properties" "edit", "download", "Tasks", and with subtasks > "Create task" and "Create approval task", "export", "associate to file", "Copy document link" and "Send to trash".

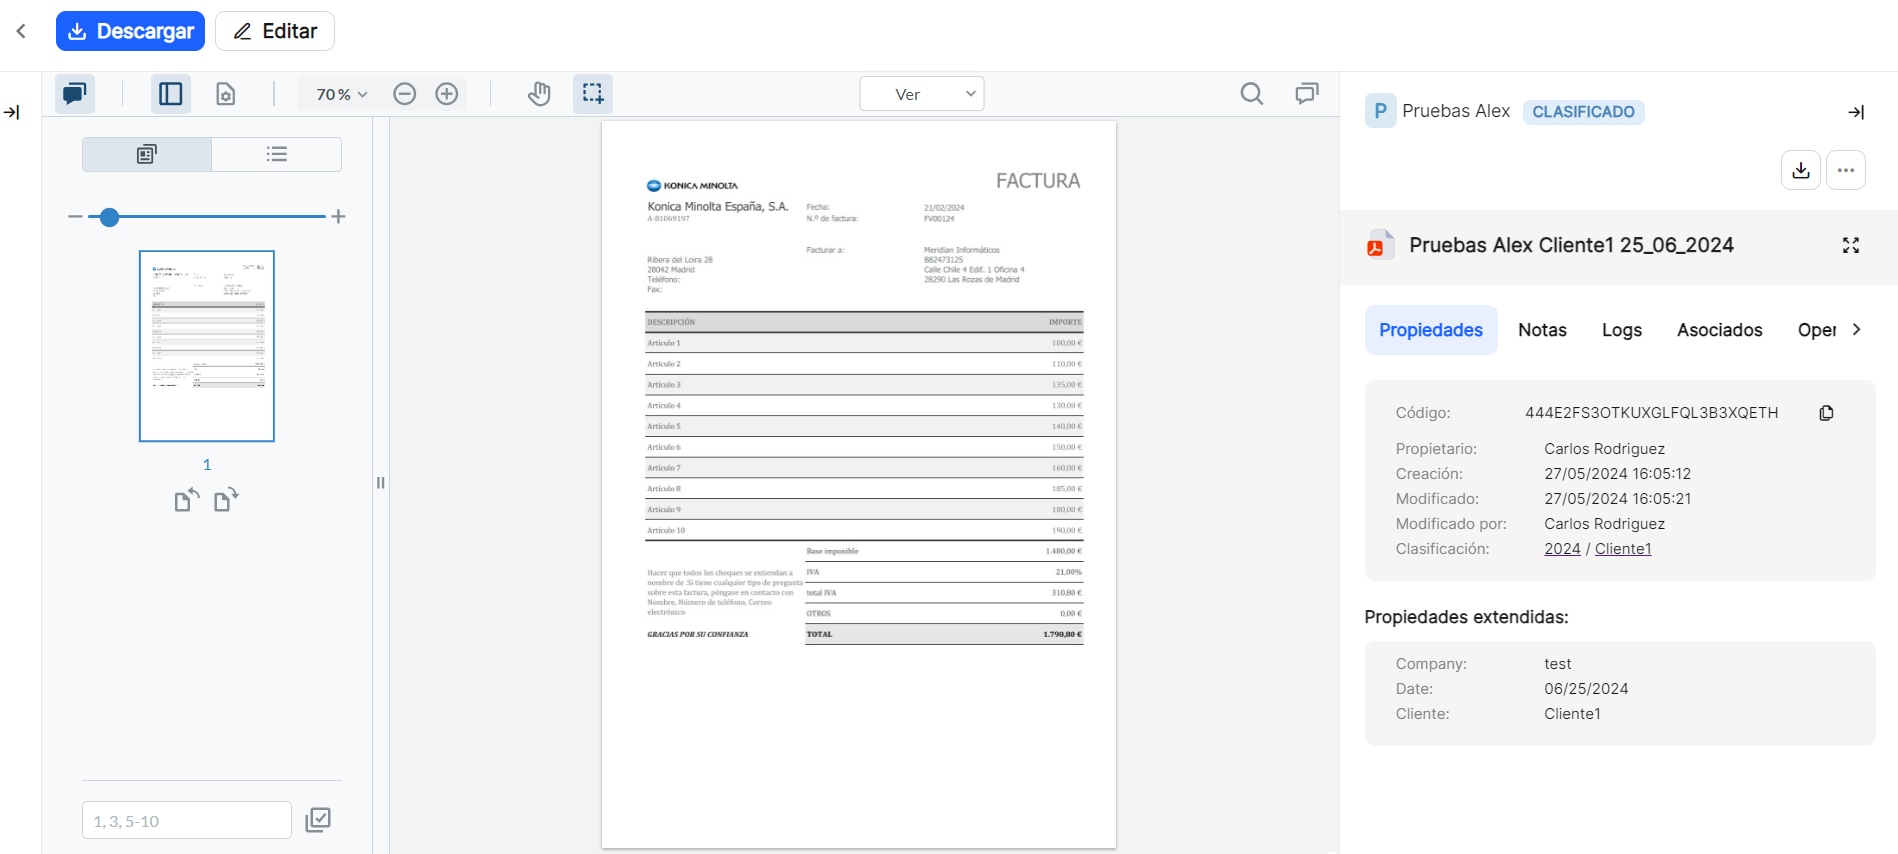
Click on the name of the document from the table with the list of documents in the menu or from the shortcut icon " ".OPEN"![]() or from the pop-up window option "DISPLAY"
or from the pop-up window option "DISPLAY" ![]() or by using the "..."the option of "OPEN"
or by using the "..."the option of "OPEN" ![]()
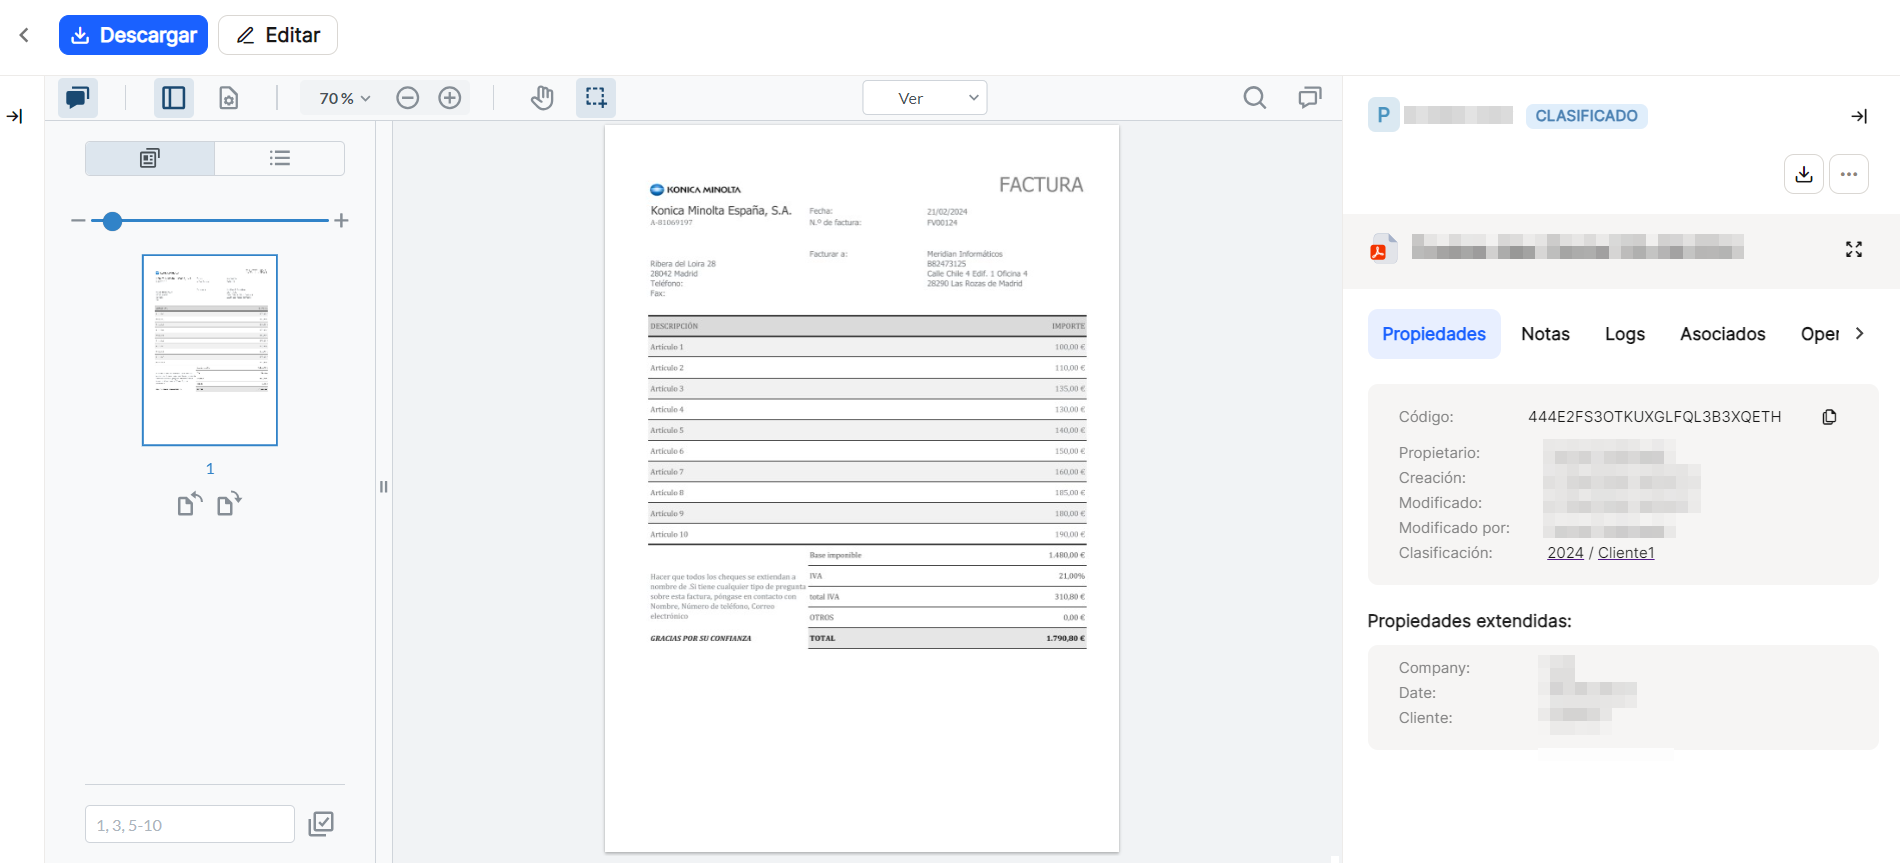
Allows the preview of the document in this format to be loaded by default.
![]()
![]() These icons, which appear on the left and right side of the window, allow you to expand or collapse the side frames displayed for the document being viewed.
These icons, which appear on the left and right side of the window, allow you to expand or collapse the side frames displayed for the document being viewed.
On the left side, the frame where the thumbnail of all the pages that are part of each document is displayed or hidden. This frame contains different options through different icons. When hovering over each of the options mentioned above, the corresponding descriptive label will appear.
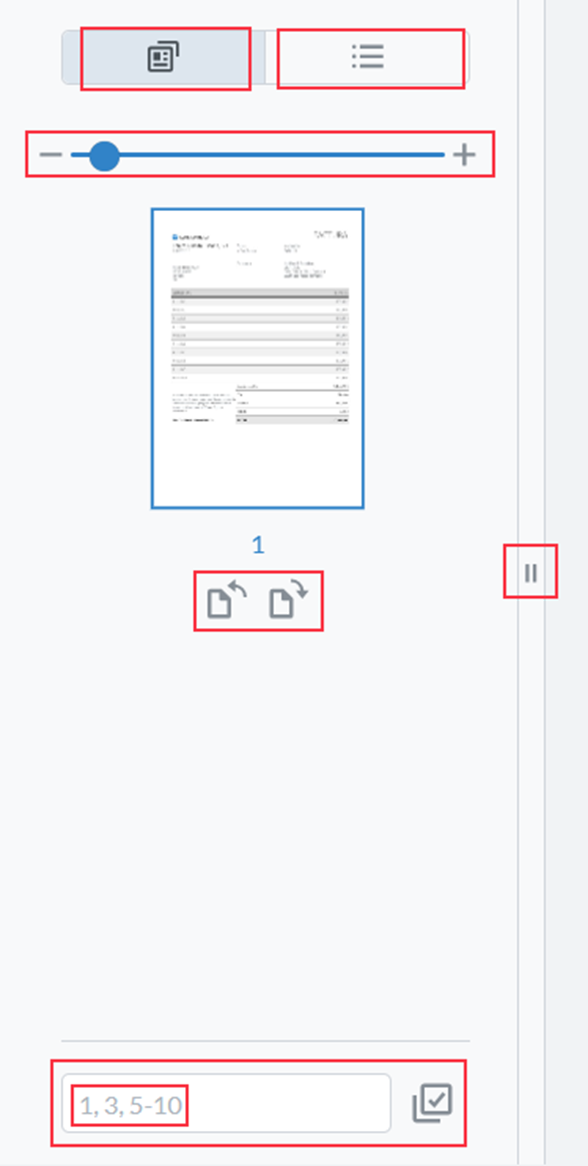
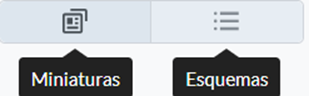
In the upper part of the frame, it is possible to view thumbnails of the documents, which is usual for documents uploaded in Waidok or the outlines they contain.
When the thumbnail option is selected, a bar appears and by clicking on the - or + signs, or by sliding the round cursor on the bar, you can decrease or increase the size of the thumbnails displayed.

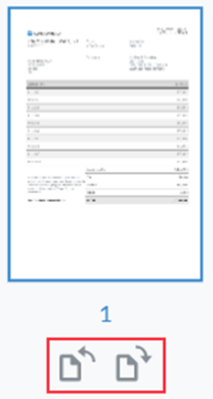
Below you can see all the thumbnails of all the pages of each document, numbered. You can also rotate the thumbnails to the left or to the right.
As long as the thumbnail display is enabled, you can change the size of the frame by dragging the bar separating the thumbnail from the document pages in the main part of the window to the left and right.

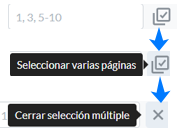
In the lower part of the frame you can select pages by their number of pages, from among all those that are part of the document, or multiple pages, allowing once they are displayed, also their rotation.
On the left side, if used, it shows or hides the frame with the list of affected Documents, whether it is one or several, marking in blue the one being previewed and showing its properties. This frame contains the display icons at grid, listed, and the "documents"When hovering over each of the options mentioned above, the corresponding descriptive label will appear. When hovering over any of the documents, whether selected or not, over the document type icon, the label with the document extension is displayed, as well as a label with the full name of the document.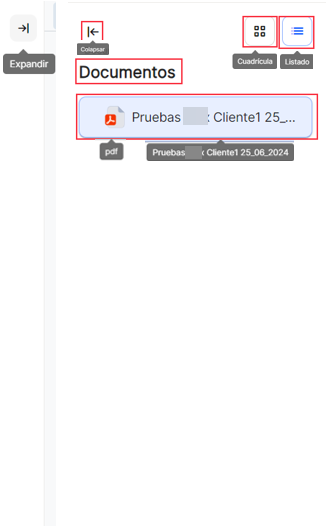
On the right side, it allows you to collapse or expand the display or not of the frame that shows different possibilities and data related to the document being viewed. This is the default view when viewing a document.
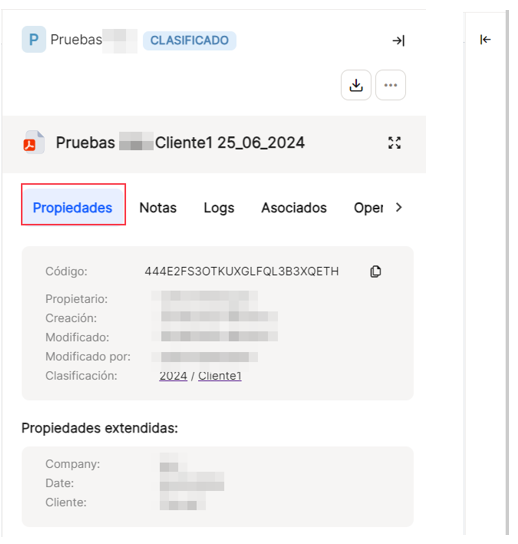
You can see different data related to the document in the display window.
In the upper part of the window, from left to right, you can see the data with the initial capital letter of the collection where the document is classified, in this case "P". ![]() the complete name of the collection, in this case "Tests -----".
the complete name of the collection, in this case "Tests -----". ![]() and its corresponding label when hovering the pointer over the name
and its corresponding label when hovering the pointer over the name ![]() and then indicates whether the document is classified or not.
and then indicates whether the document is classified or not. ![]() . The last icon on the right,
. The last icon on the right,  must be used to collapse this window and stop displaying it in the document view.

The following line of icons on the right side of the window will allow you to download the document to the default folder of the browser ![]() or by clicking on the icon "..."a more extensive menu will be displayed, with added functions, such as "open", "properties" "edit", "download", "Tasks", and with subtasks > "Create task" and "Create approval task", "export", "associate to file", "Copy document link" and "Send to trash", which could also be obtained from the main menu window.
or by clicking on the icon "..."a more extensive menu will be displayed, with added functions, such as "open", "properties" "edit", "download", "Tasks", and with subtasks > "Create task" and "Create approval task", "export", "associate to file", "Copy document link" and "Send to trash", which could also be obtained from the main menu window.
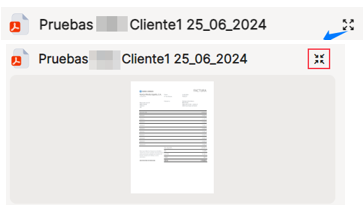
The following option allows you to expand the thumbnail generated in the document by clicking on the icon  and can be overlaid by clicking on the same icon.
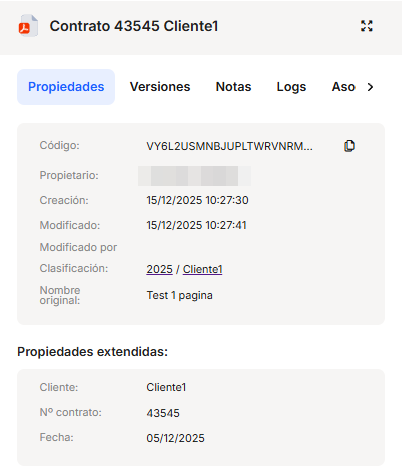
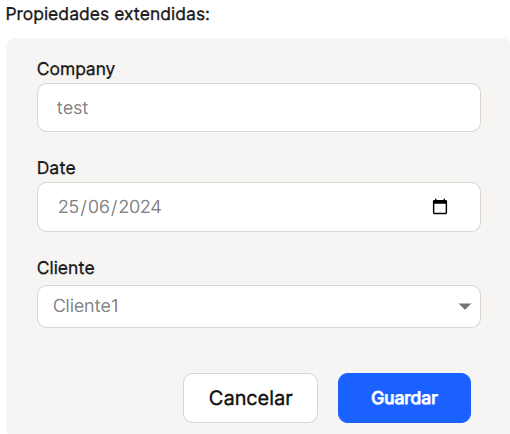
The first option on the following ribbon is"Properties", which allows you to display both the basic document properties, which are fixed in the application and some of them are automatically generated by the application, as well as those called"extended properties", which can be different and customized for each collection or document types.
The basic properties will show data such as the "Code", which is an automatic alphanumeric combination generated by the application and assigned to the document for its univocal identification, and that with the icon copy ![]() The "Search" button allows you to paste it in the search window or in any other place in the Windows environment. It also appears the "Owner"The user who will be the owner of the document as role and security profiles are defined. "Creation"reflects the date of creation of the document in the application, as well as "Modified"with the date of modification of the document and "Modified by"shows the user who made the changes. "Classification"shows the total path in which the document is classified.
The "Search" button allows you to paste it in the search window or in any other place in the Windows environment. It also appears the "Owner"The user who will be the owner of the document as role and security profiles are defined. "Creation"reflects the date of creation of the document in the application, as well as "Modified"with the date of modification of the document and "Modified by"shows the user who made the changes. "Classification"shows the total path in which the document is classified.
The"extended properties" are particular and configurable for each environment.
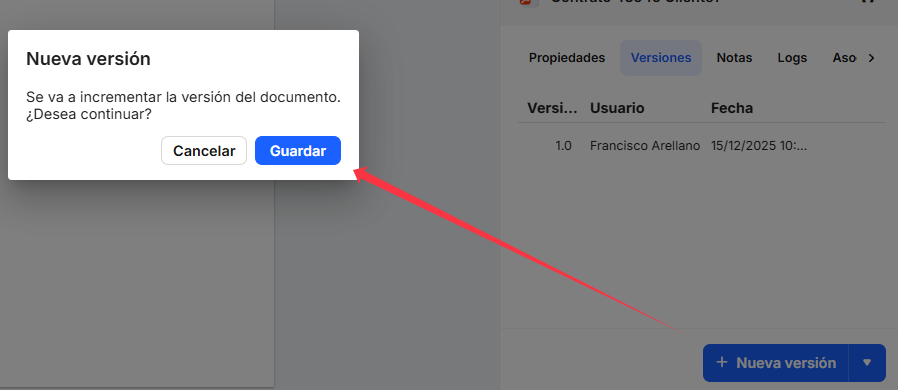
"Versions" allows you to control the different versions of a document with the details of the user who generated the version and the date of the version.
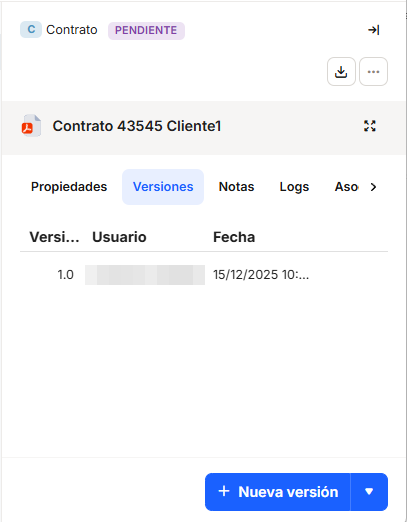
From the "+ New version" button, a new version of the document will be generated after the last one registered in the system in a sequential and automatic manner. The numbering will increase from the initial version (default 1.0), then 1.1, 1.2, and so on.
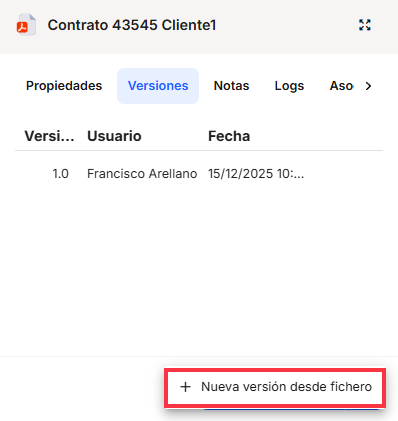
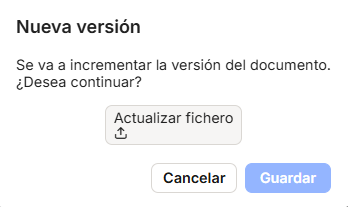
If you click on the right side of the button, the system will give you the option to add a document as a new version of the current one.
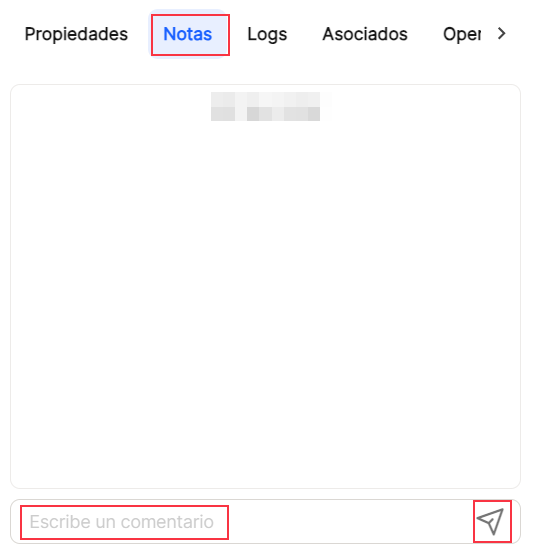
"Notes", allows you to add annotations to the document internally, without modifying it, which are written in the lower part of the window, and by clicking on the arrow icon these characters are sent and saved.
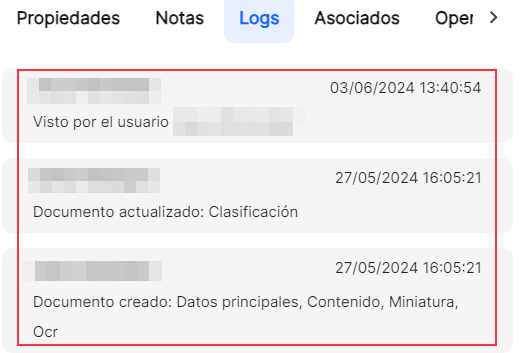
"Logs" provides the list of which users and what operations have been performed on the document, as well as the date and time of the operation that affected each document.
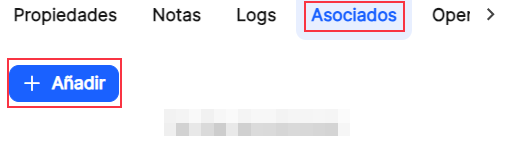
From"Associated", you can display the list of documents associated to the one you are viewing. With the"Add" icon you can display the"Associate document" window.
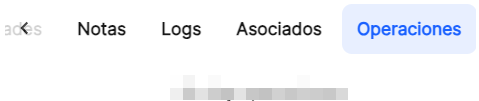
"Transactions" reflects the list of transactions that have affected the document.
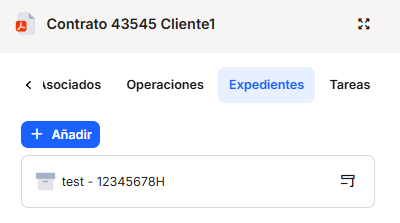
"Files" shows the files associated with the document, and you can associate it with others using the "Add" button.
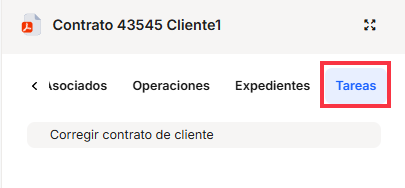
"Tasks" displays the tasks associated with the current document.
ICONO ![]() from the table with the list of documents in the Menu " ".Document ExplorerThe values in the list will change based on the permissions for the user registered in the tool for the selected document.
from the table with the list of documents in the Menu " ".Document ExplorerThe values in the list will change based on the permissions for the user registered in the tool for the selected document.
![]()
Allows you to open the document display, with the described options.
![]()
Displays the document properties frame.
![]()
IMPORTANT. Download the document to the default folder of the user's browser, with the name it has in the application, for editing and subsequent uploading. It is IMPORTANT to note that the same name of the file or document must be kept, so that the system can identify it and replace it with the new version of the document.
![]() When the "edit" edition is activated and the document is downloaded, a new icon, "up"The user can select the document, whether it has been modified or not, but always without changing the name under which it was downloaded, from the location where the user has saved it.
When the "edit" edition is activated and the document is downloaded, a new icon, "up"The user can select the document, whether it has been modified or not, but always without changing the name under which it was downloaded, from the location where the user has saved it.
![]() When the "edit" edition is activated and the document is downloaded, a new icon, "release"If the document is not going to be uploaded again, you can leave '...' as '...'.closedThe document can be modified or edited at any time. If the document is not released, the properties cannot be changed and the document cannot be edited, as the option disappears from the menu.
When the "edit" edition is activated and the document is downloaded, a new icon, "release"If the document is not going to be uploaded again, you can leave '...' as '...'.closedThe document can be modified or edited at any time. If the document is not released, the properties cannot be changed and the document cannot be edited, as the option disappears from the menu.
![]() Allows the document to be downloaded to the default folder of the user's browser, with the name it has in the application.
Allows the document to be downloaded to the default folder of the user's browser, with the name it has in the application.
 Allows you to set up a new remote signature flow for the selected document.
![]() It opens a drop-down menu with two options.
It opens a drop-down menu with two options.
![]() Clicking on this option opens a new window to create a task that will affect that document, which can be consulted in the option of Tasks menu.
Clicking on this option opens a new window to create a task that will affect that document, which can be consulted in the option of Tasks menu.
![]() Clicking on this option opens a new window to create an approval task that will affect that document, which can be viewed in the Tasks menu.
Clicking on this option opens a new window to create an approval task that will affect that document, which can be viewed in the Tasks menu.
![]() Allows the document to be associated to an existing file. Explained in the Files menu.
Allows the document to be associated to an existing file. Explained in the Files menu.
![]() It will allow the user to copy a link that refers directly to a document, to be able to send it or send it by any means, so that a user validated in Waidok, in the same environment can access it directly and perform the tasks allowed.
It will allow the user to copy a link that refers directly to a document, to be able to send it or send it by any means, so that a user validated in Waidok, in the same environment can access it directly and perform the tasks allowed.
![]() Allows the document to be sent to the trash, after a pop-up warning window to confirm or cancel this operation. Subsequently the user will be able to perform the operations allowed for the "Garbage can"already explained in Dashboard. Framework and search bar
Allows the document to be sent to the trash, after a pop-up warning window to confirm or cancel this operation. Subsequently the user will be able to perform the operations allowed for the "Garbage can"already explained in Dashboard. Framework and search bar
![]() It will allow the user to modify the values of the extended properties of those that allow their modification and according to the characteristics that have been previously defined for each of them, regardless of the collection and documents they affect. Likewise, these modifications will only be possible if the user has permissions to make these changes. Then it is necessary to "save"to keep the changes or "cancel"if you do not want to validate them.
It will allow the user to modify the values of the extended properties of those that allow their modification and according to the characteristics that have been previously defined for each of them, regardless of the collection and documents they affect. Likewise, these modifications will only be possible if the user has permissions to make these changes. Then it is necessary to "save"to keep the changes or "cancel"if you do not want to validate them.
In the central part of the window, the application displays, through an Acrobat plug-in integrated in the solution, the thumbnails and all the pages of the document. It will have one dimension or another on the screen depending on whether or not any of the aforementioned options have been collapsed. In addition, other icons are shown that will enable the use of added functionalities.

The different icons shown allow the following operations to be performed:

"Create document from template"
"Create document from template" will allow you to generate documents in an automated way by filling in the mandatory data from templates already stored in Waidok. Once clicked, it will display a new window, called"General", which will appear on the right side of the main window, and will show a series of mandatory data, so that the document will be generated correctly. The collection in which the document is going to be stored must be specified, choose which of the templates or templates of that collection I need to create that document, and the smartinbox or inbox that is necessary, and that will show us the corresponding properties or metadata, to complete them. Once all the mandatory properties have been filled in, the"Save" button must be used to save the template, and the document will be created with this metadata. In case you want to delete the data of the properties you can use the"Clear" option.
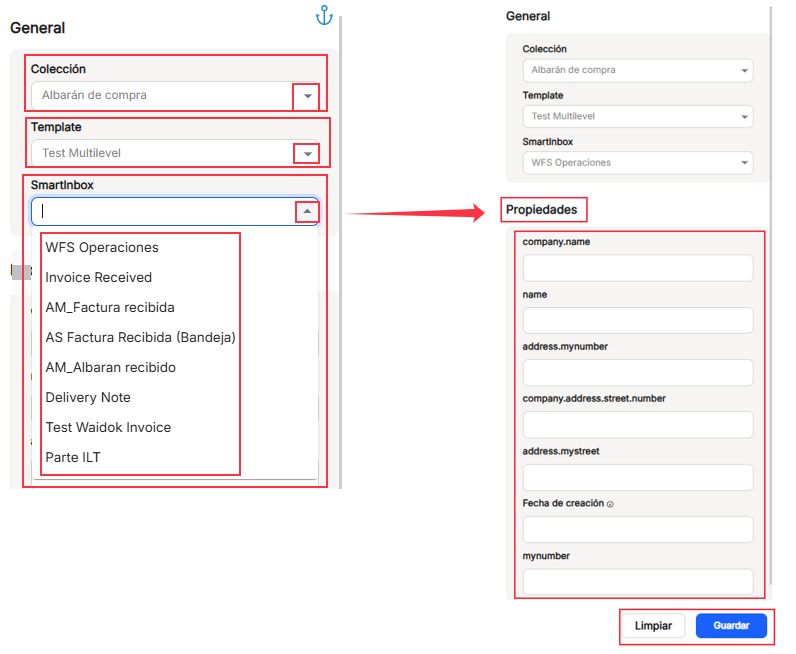
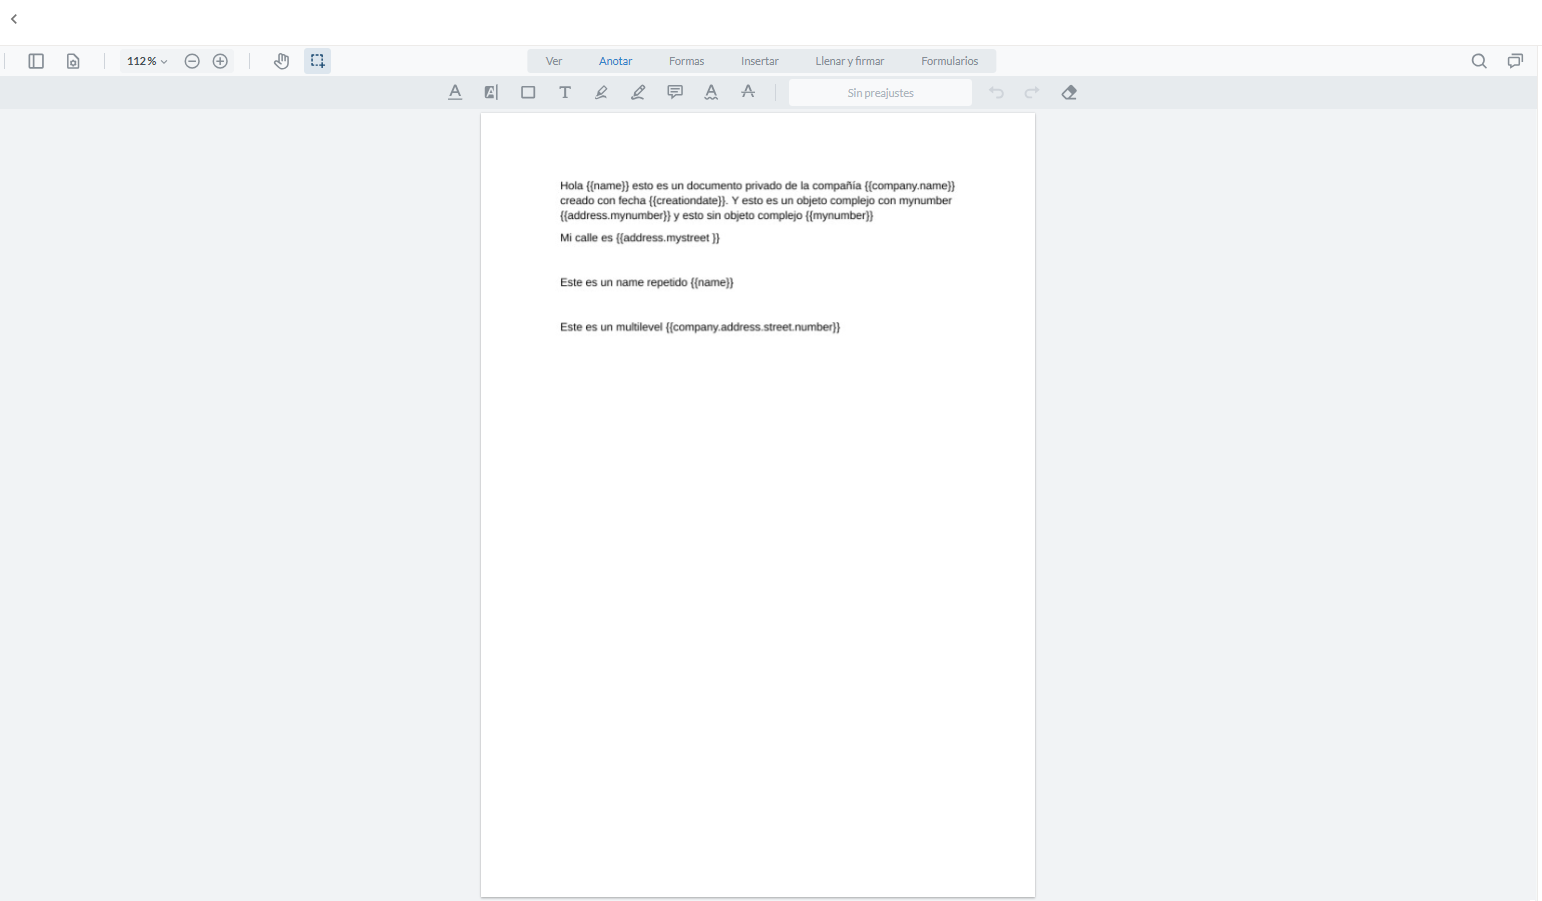
In this new window, in the left and central part, the preview of the template content will be shown.
No comments to display
No comments to display